This post may contain affiliate links. Please read our disclosure policy.
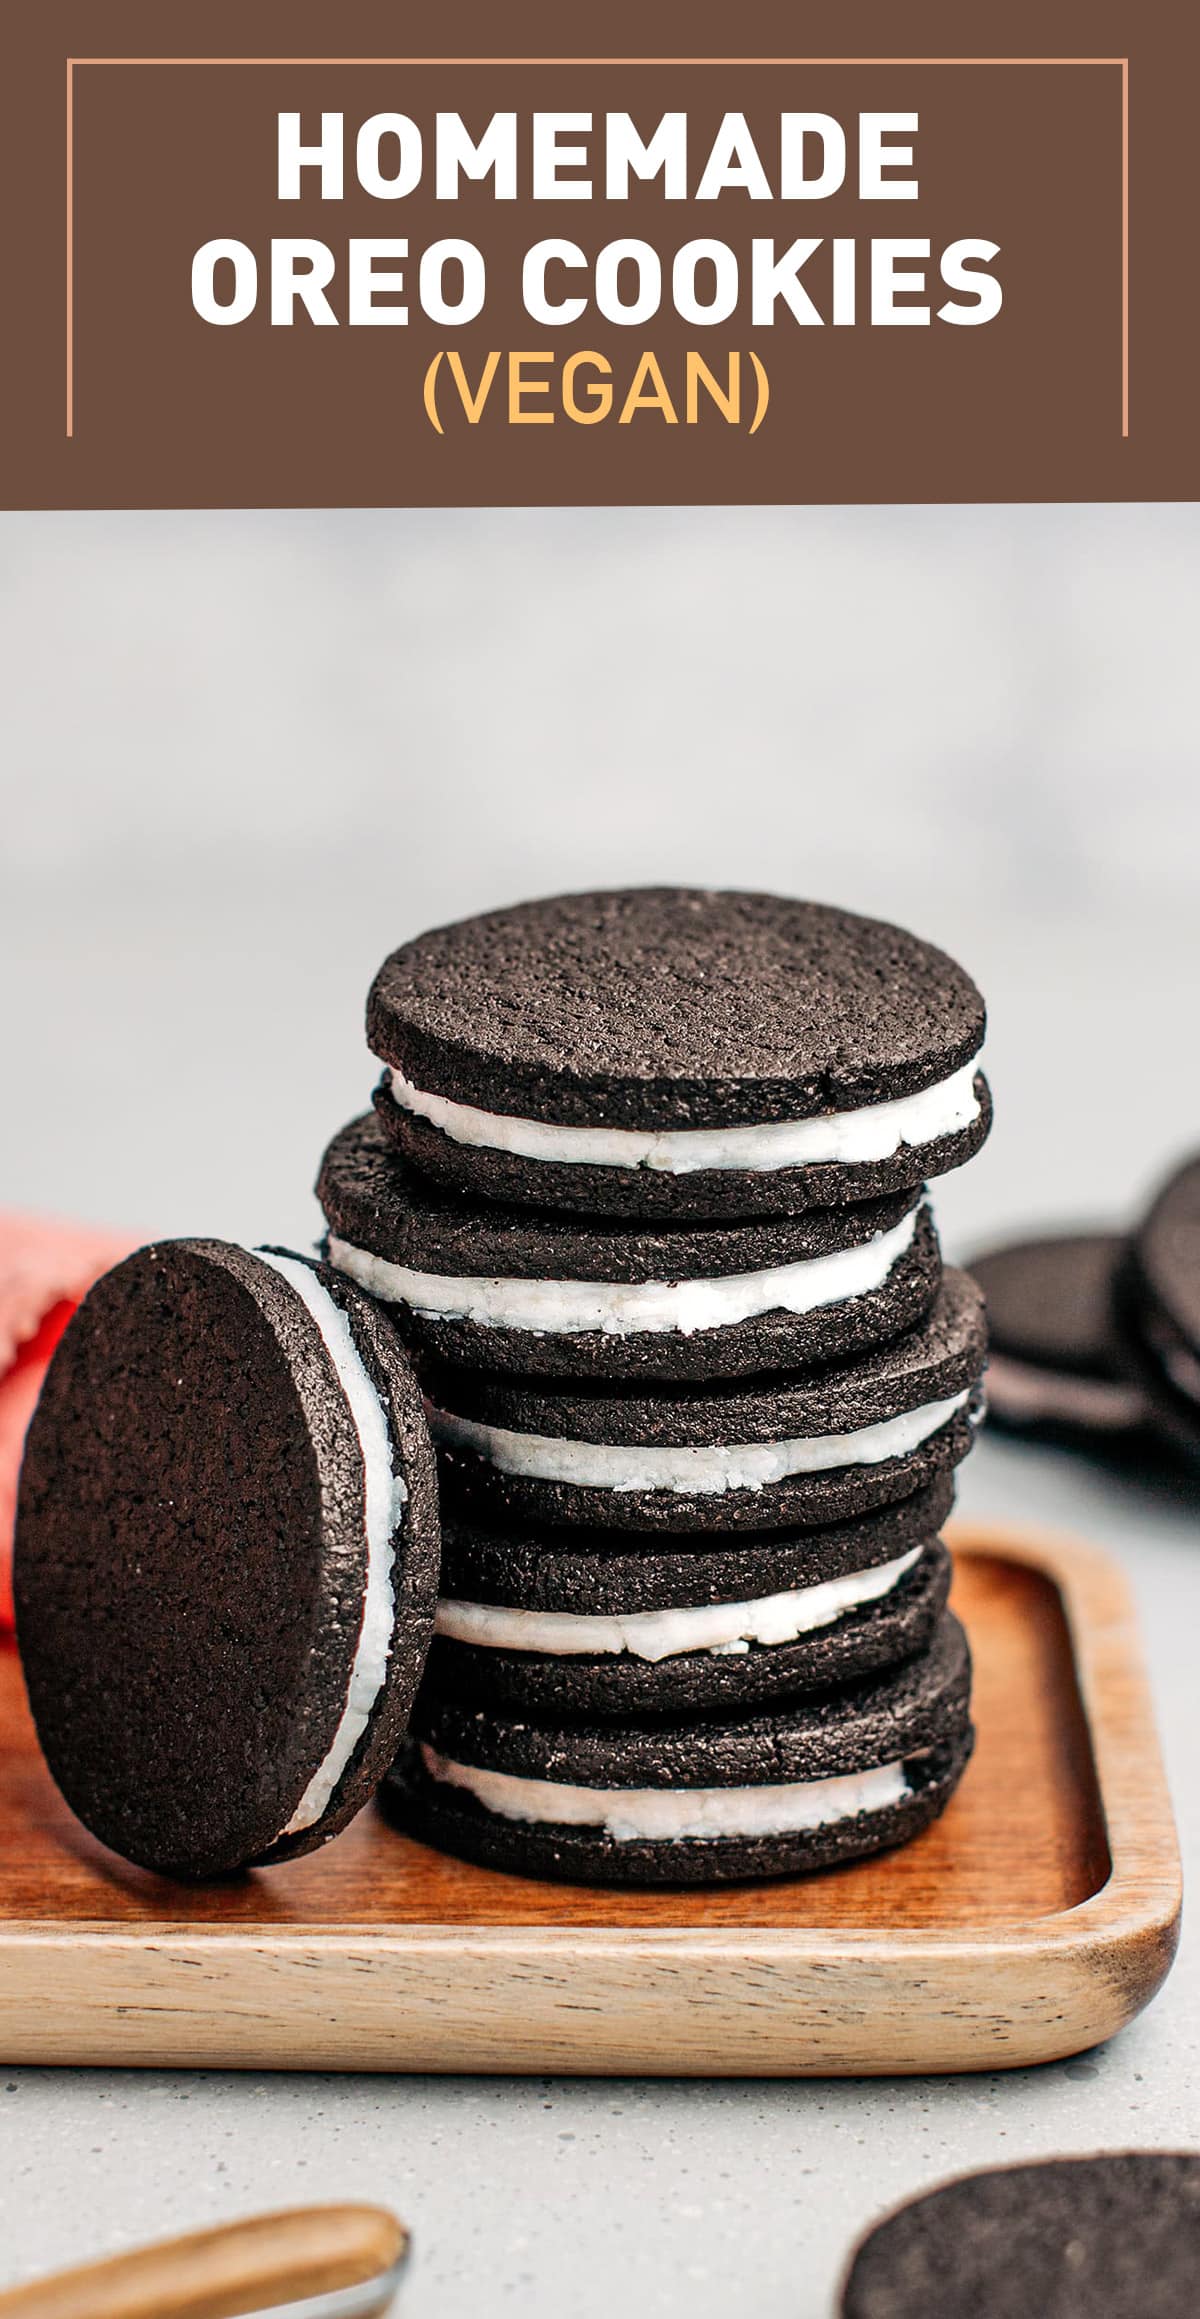
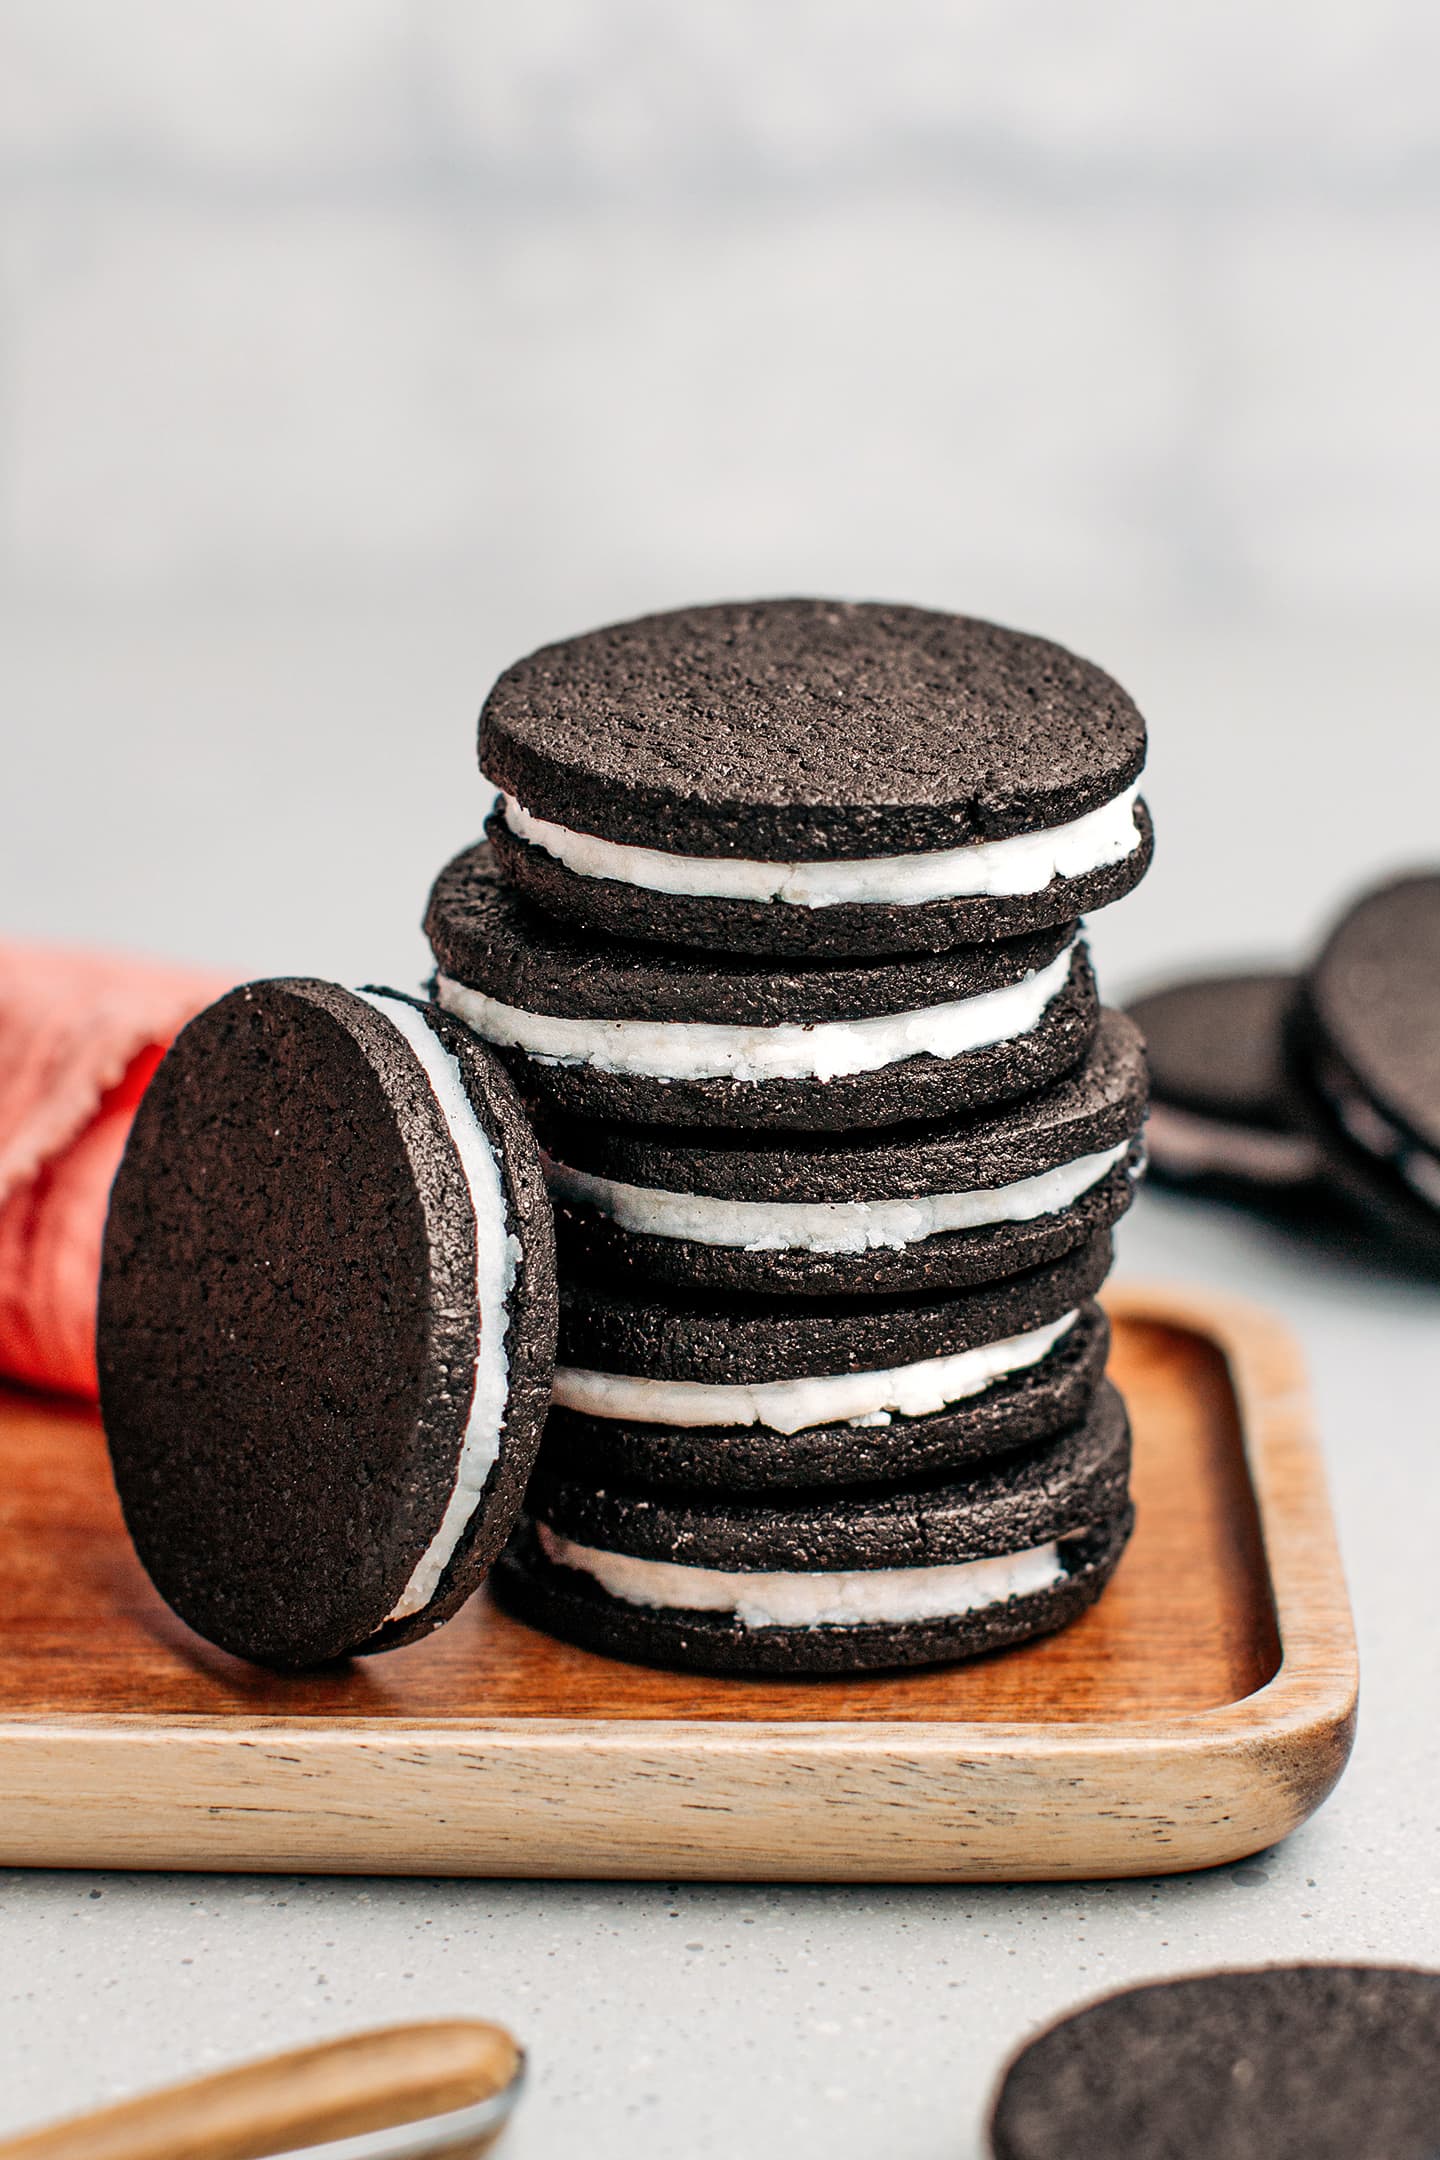
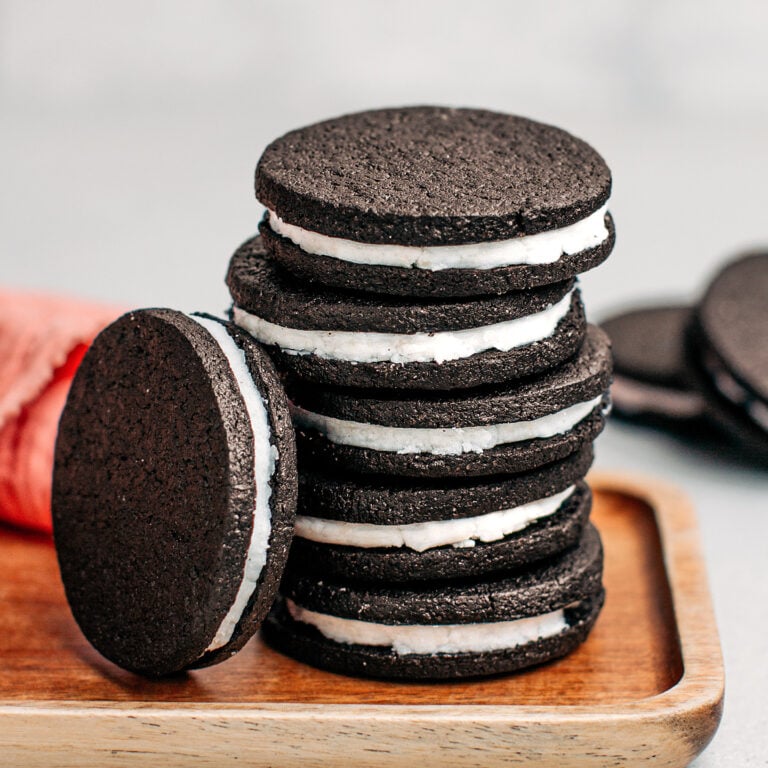
Relive your childhood memories with these homemade Oreo cookies! These school snack classics are simple to prepare, require just a few ingredients, and come out perfectly crispy every time! They are dark and chocolatey and generously filled with sweet vanilla filling!
⭐️ Why You Should Try It
- Perfectly crispy and snappy. These Oreo cookies are super crispy, with a rich and buttery flavor and a subtle shortbread texture, making them truly irresistible. Everyone loves them!
- They taste (almost) like the authentic ones. You will be surprised by how close these homemade Oreos taste to the originals! They are a bit more chocolatey (because we are chocolate lovers) and have a rich vanilla filling. Plus, you can keep them for up to 10 days in an airtight container!
- Quick and simple. This recipe couldn’t be easier. You make the dough, flatten it, and cut out cookies before baking them for a few minutes. The rest consists of filling a cookie with vanilla cream and closing it with another one to make a sandwich.
📘 What Are Oreo Cookies
Oreo is a sandwich cookie brand consisting of 2 chocolate biscuits and a vanilla cream filling. It first appeared on the market in 1912 and has quickly become one of the most loved commercial cookies in the world.
🍫 Ingredient Notes
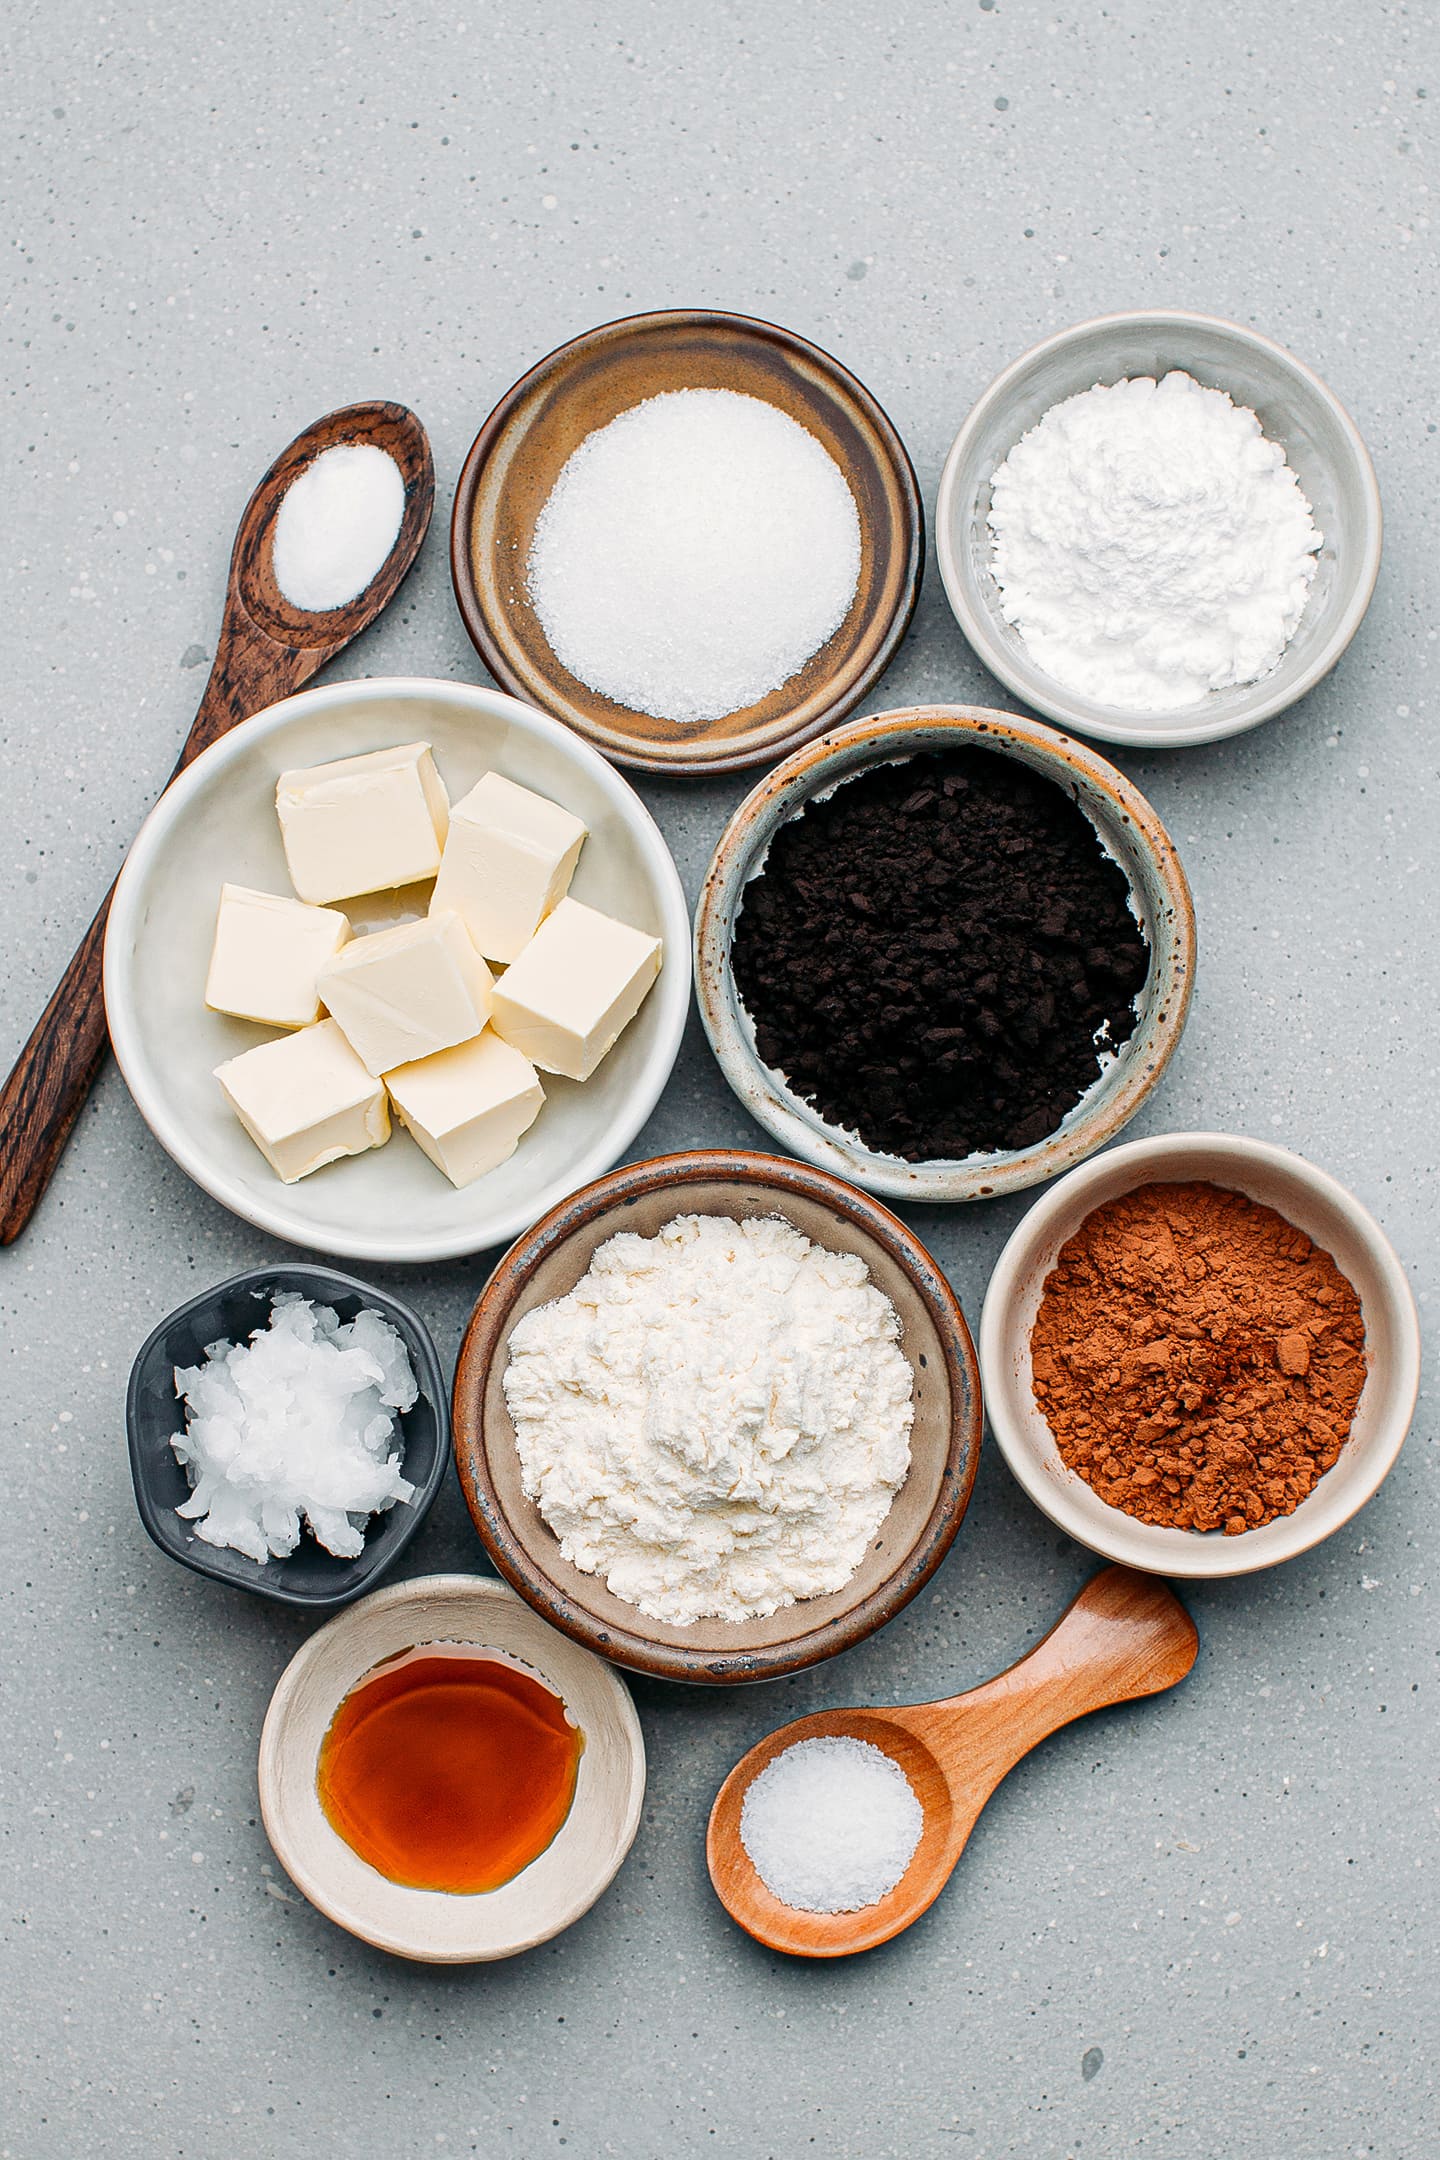
Here are the ingredients that you will need to make these vegan Oreos:
- All-purpose flour – Use regular all-purpose flour.
- Butter – For crispiness and richness. In my opinion, vegan butter with a neutral taste works best to achieve an authentic flavor. If you use butter with a strong aroma, it can overpower the taste and make the cookies too buttery, which will partially cover the taste of the chocolate.
- Sugar – Use granulated white sugar. You could use coconut sugar but it will largely alter the flavor of the cookies, so I do not recommend it either.
- Cocoa powder – We will be using two types of cocoa powder. The first one is your regular unsweetened cocoa powder that is brown in color. The second one is a darker kind, called black cocoa powder. You can read more about it below.
- Baking powder – To achieve a slightly more aerated texture. You can use baking soda instead of baking powder for crispier cookies.
- Vanilla extract – For flavor. You can use store-bought or homemade vanilla extract.
- Coconut oil – Instead of going for a buttercream filling, I went with a combination of deodorized coconut oil, powdered sugar, and vanilla extract for the filling. The reason for that is that I wanted the cookies to last for days at room temperature, just like the originals.
- Powdered sugar – To sweeten the filling.
What is black cocoa powder?
Black cocoa powder is a type of cocoa powder that has been Dutch-processed and heavily alkalized. This process produces a darker cocoa powder than regular cocoa powder. It has a deep black color and a very fine texture. Black cocoa powder is typically used as a coloring to create dark desserts.
What does it taste like?
To me, black cocoa powder has a milder taste than regular cocoa powder. Unlike what we could imagine, it is not more bitter or stronger. This is my opinion, and obviously, each person’s taste is different.
🥣 How to Make It
1. Make the dough
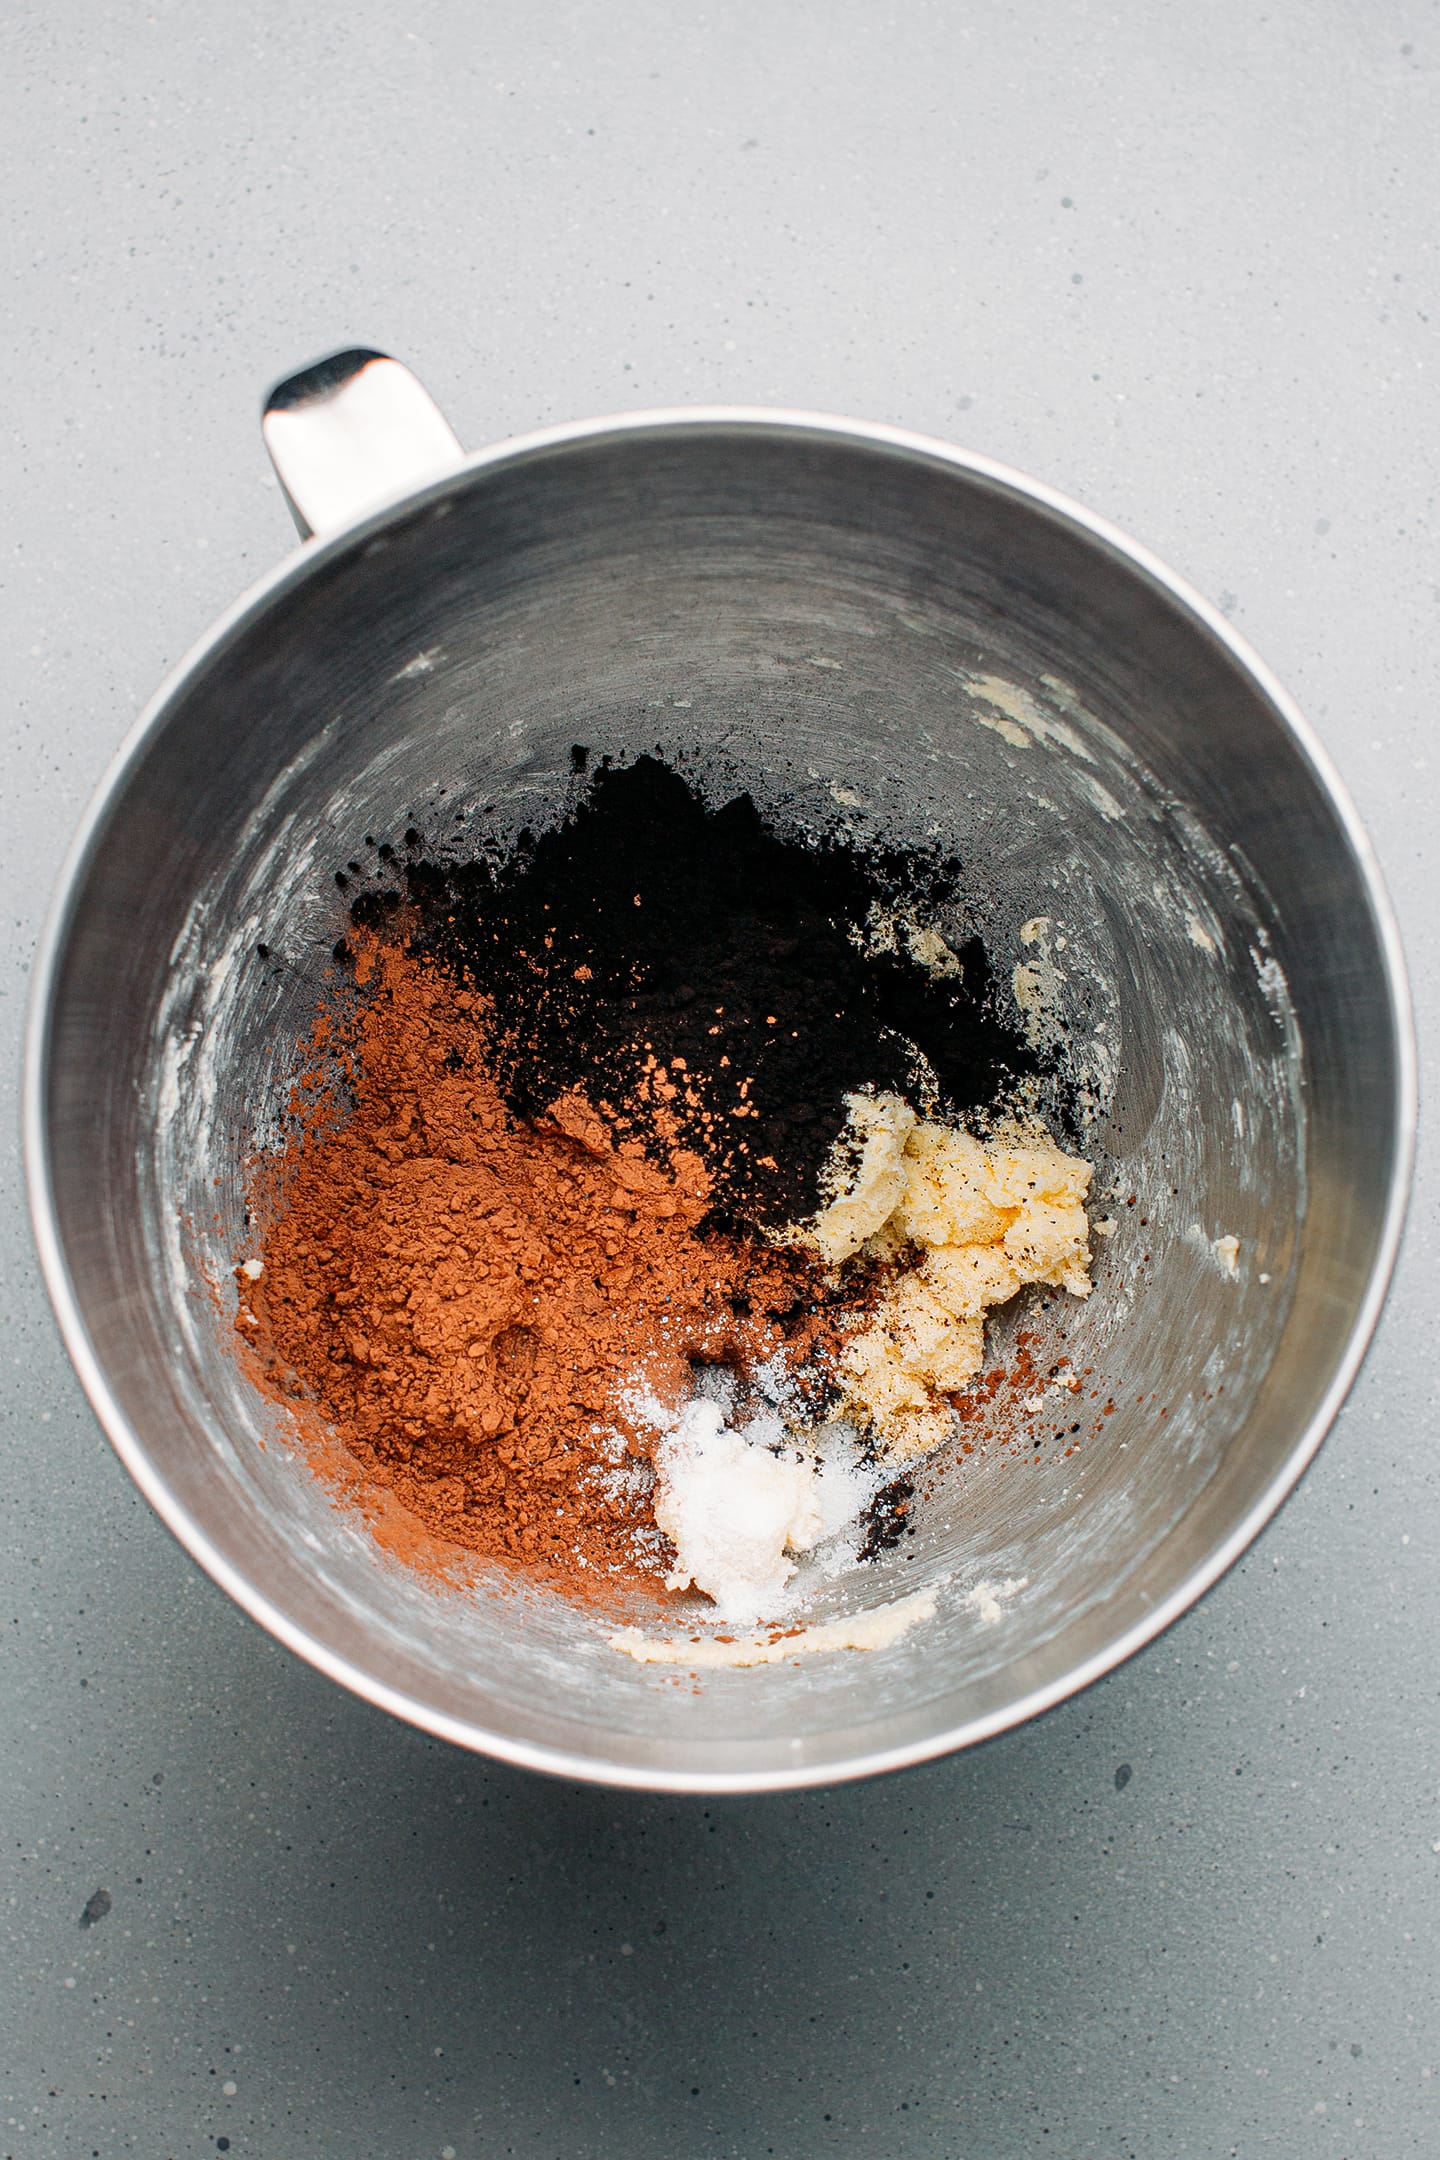
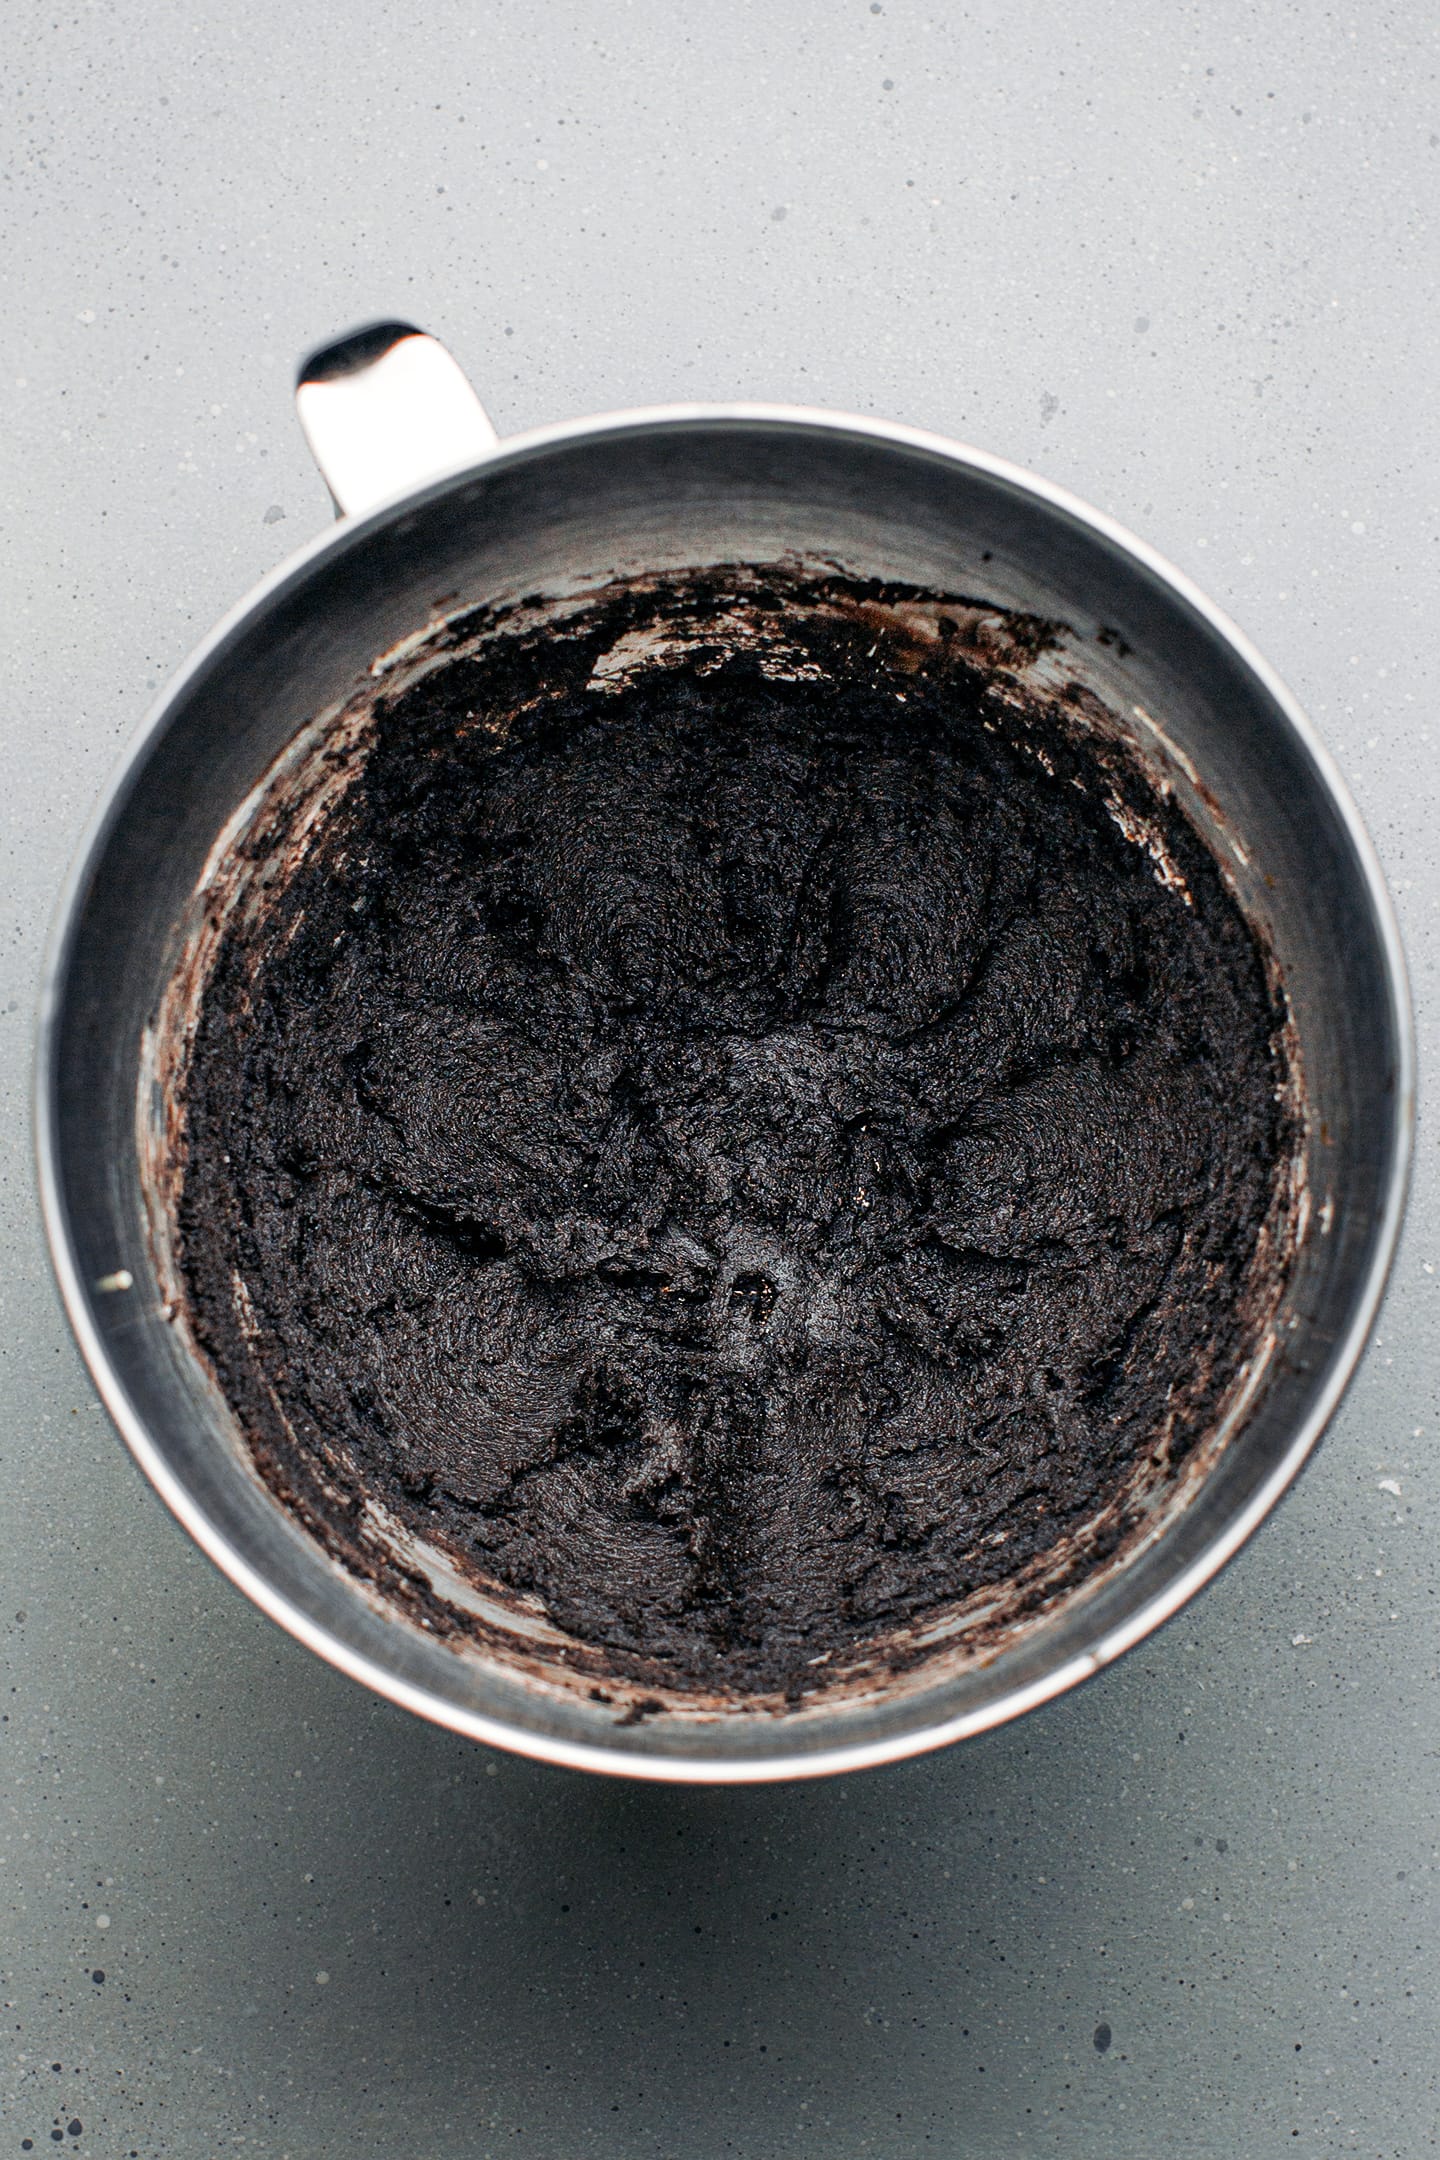
- Cream the butter. Add the diced butter and sugar to a stand mixer fitted with the flat beater attachment. Cream the butter with the sugar on medium speed for about 2 minutes or until fully combined.


- Add the cocoa powders. Next, add both types of cocoa powder, baking powder, and salt. Cream for another 20-30 seconds.
- Add the flour. Add the flour, almond milk, and vanilla extract. Knead for another 30 seconds. At this point, the dough should have the texture of cookie dough.
2. Flatten and cut out
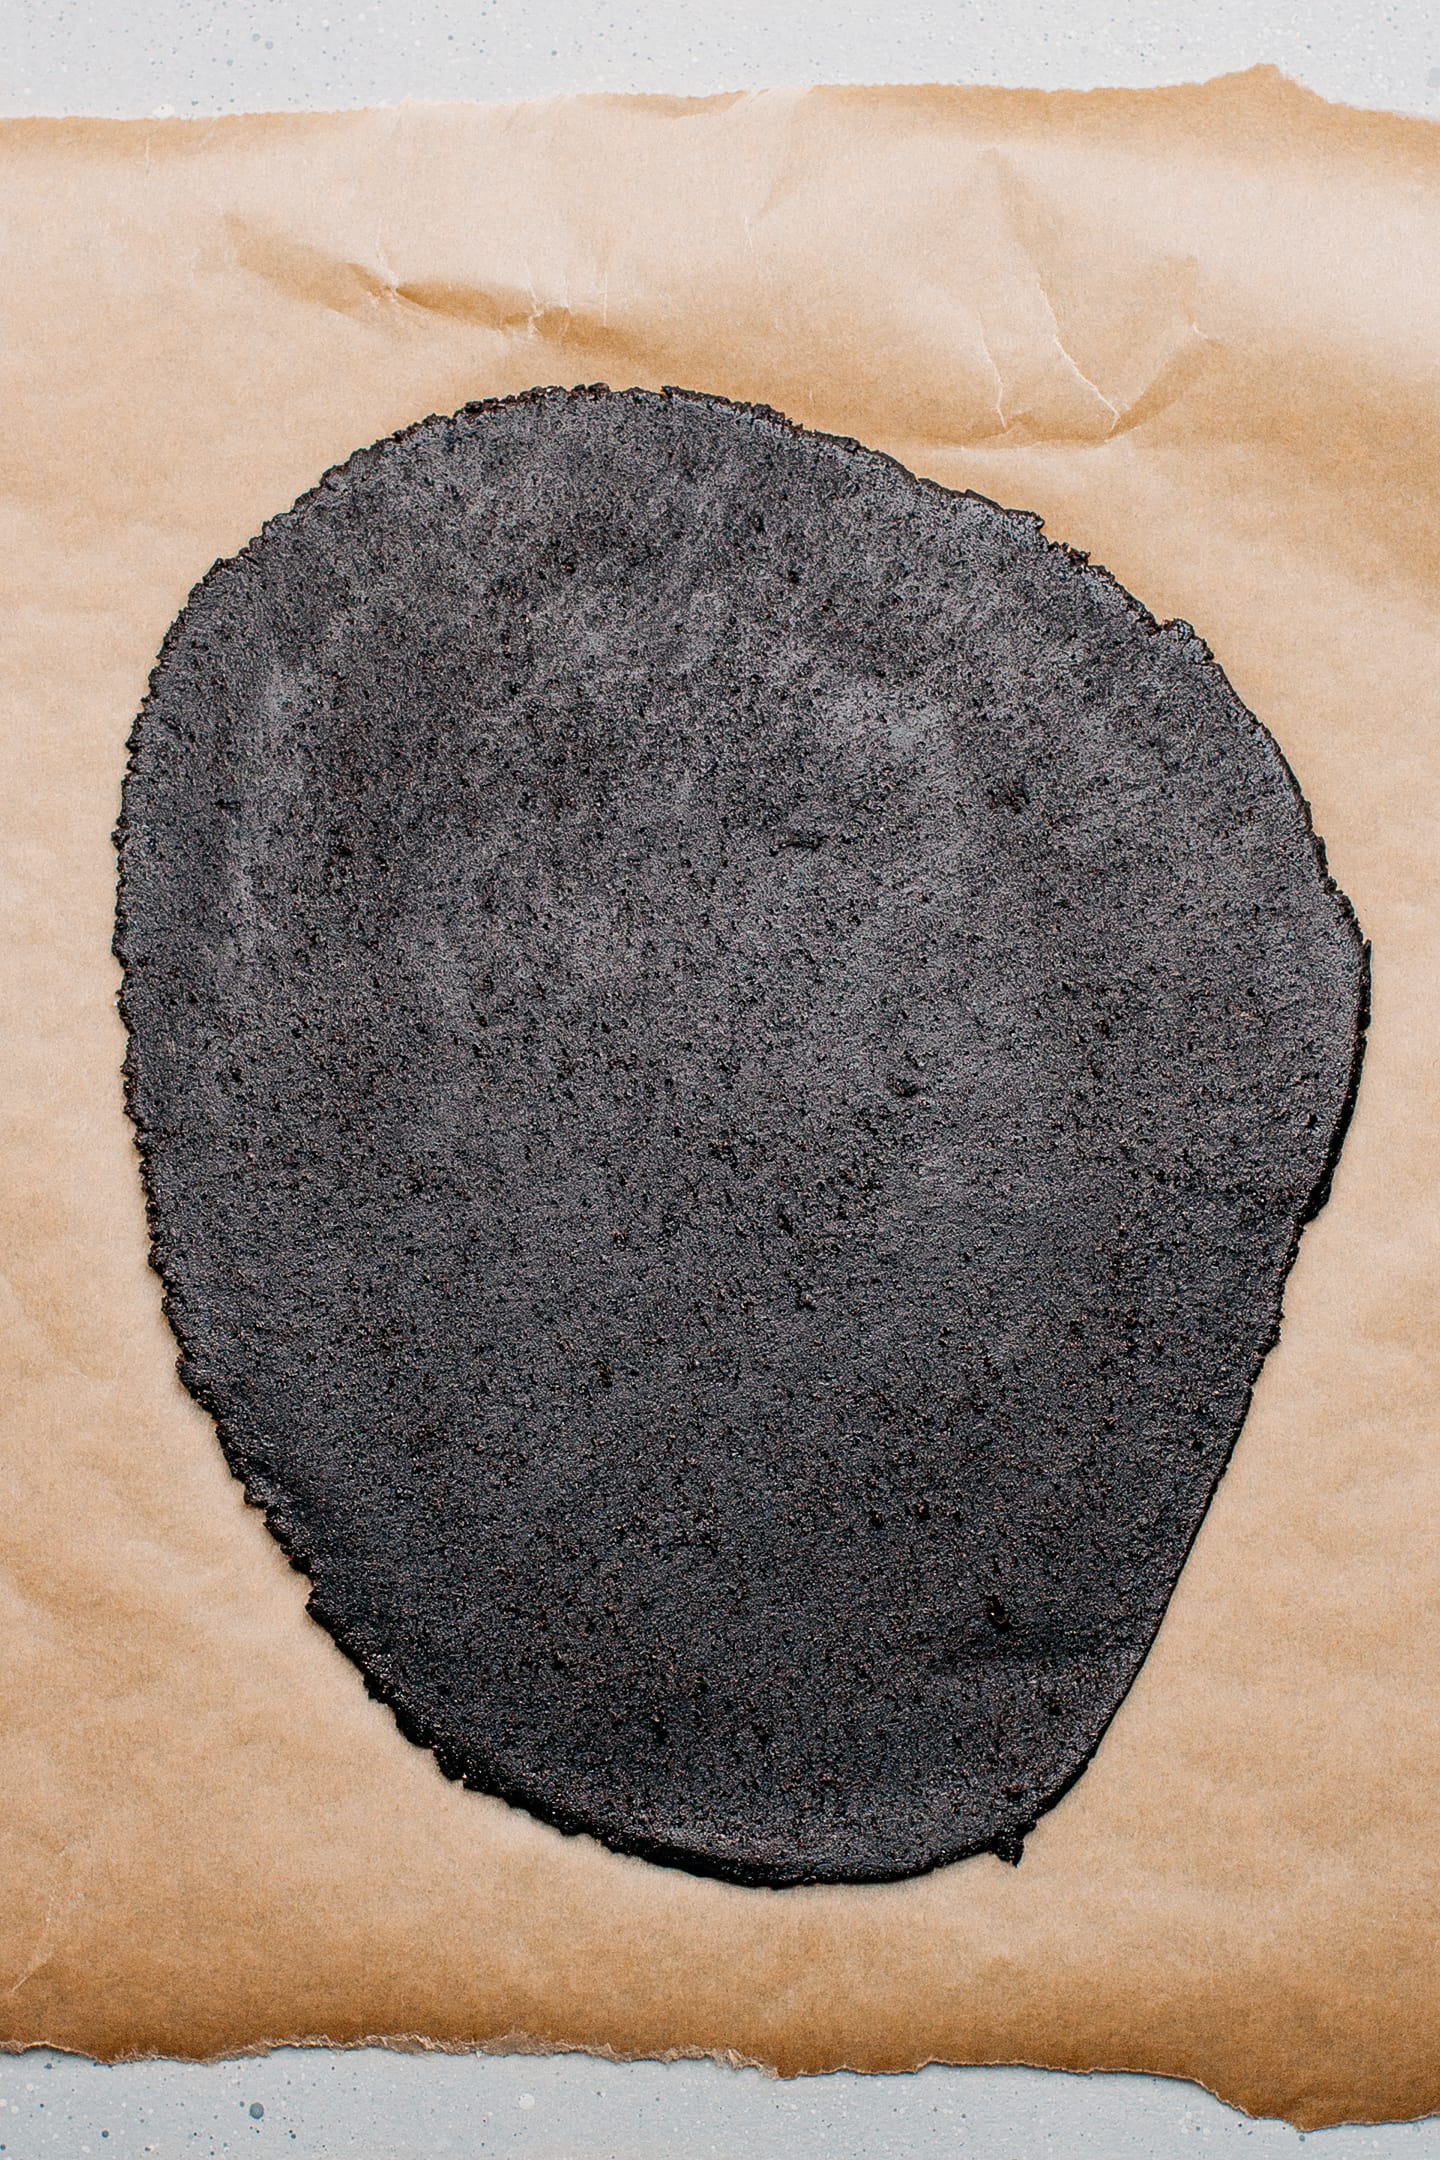
- Flatten. Transfer the dough to a piece of parchment paper. Top with another layer of parchment paper and flatten the dough into a 1/8-inch (3-4mm) thickness using a rolling pin. Try to make the dough as even as possible.
- Chill. Place the flattened dough on a baking sheet or flat plate and chill it in the refrigerator for about 2 hours. You can speed up this process by freezing it for about 20 minutes.
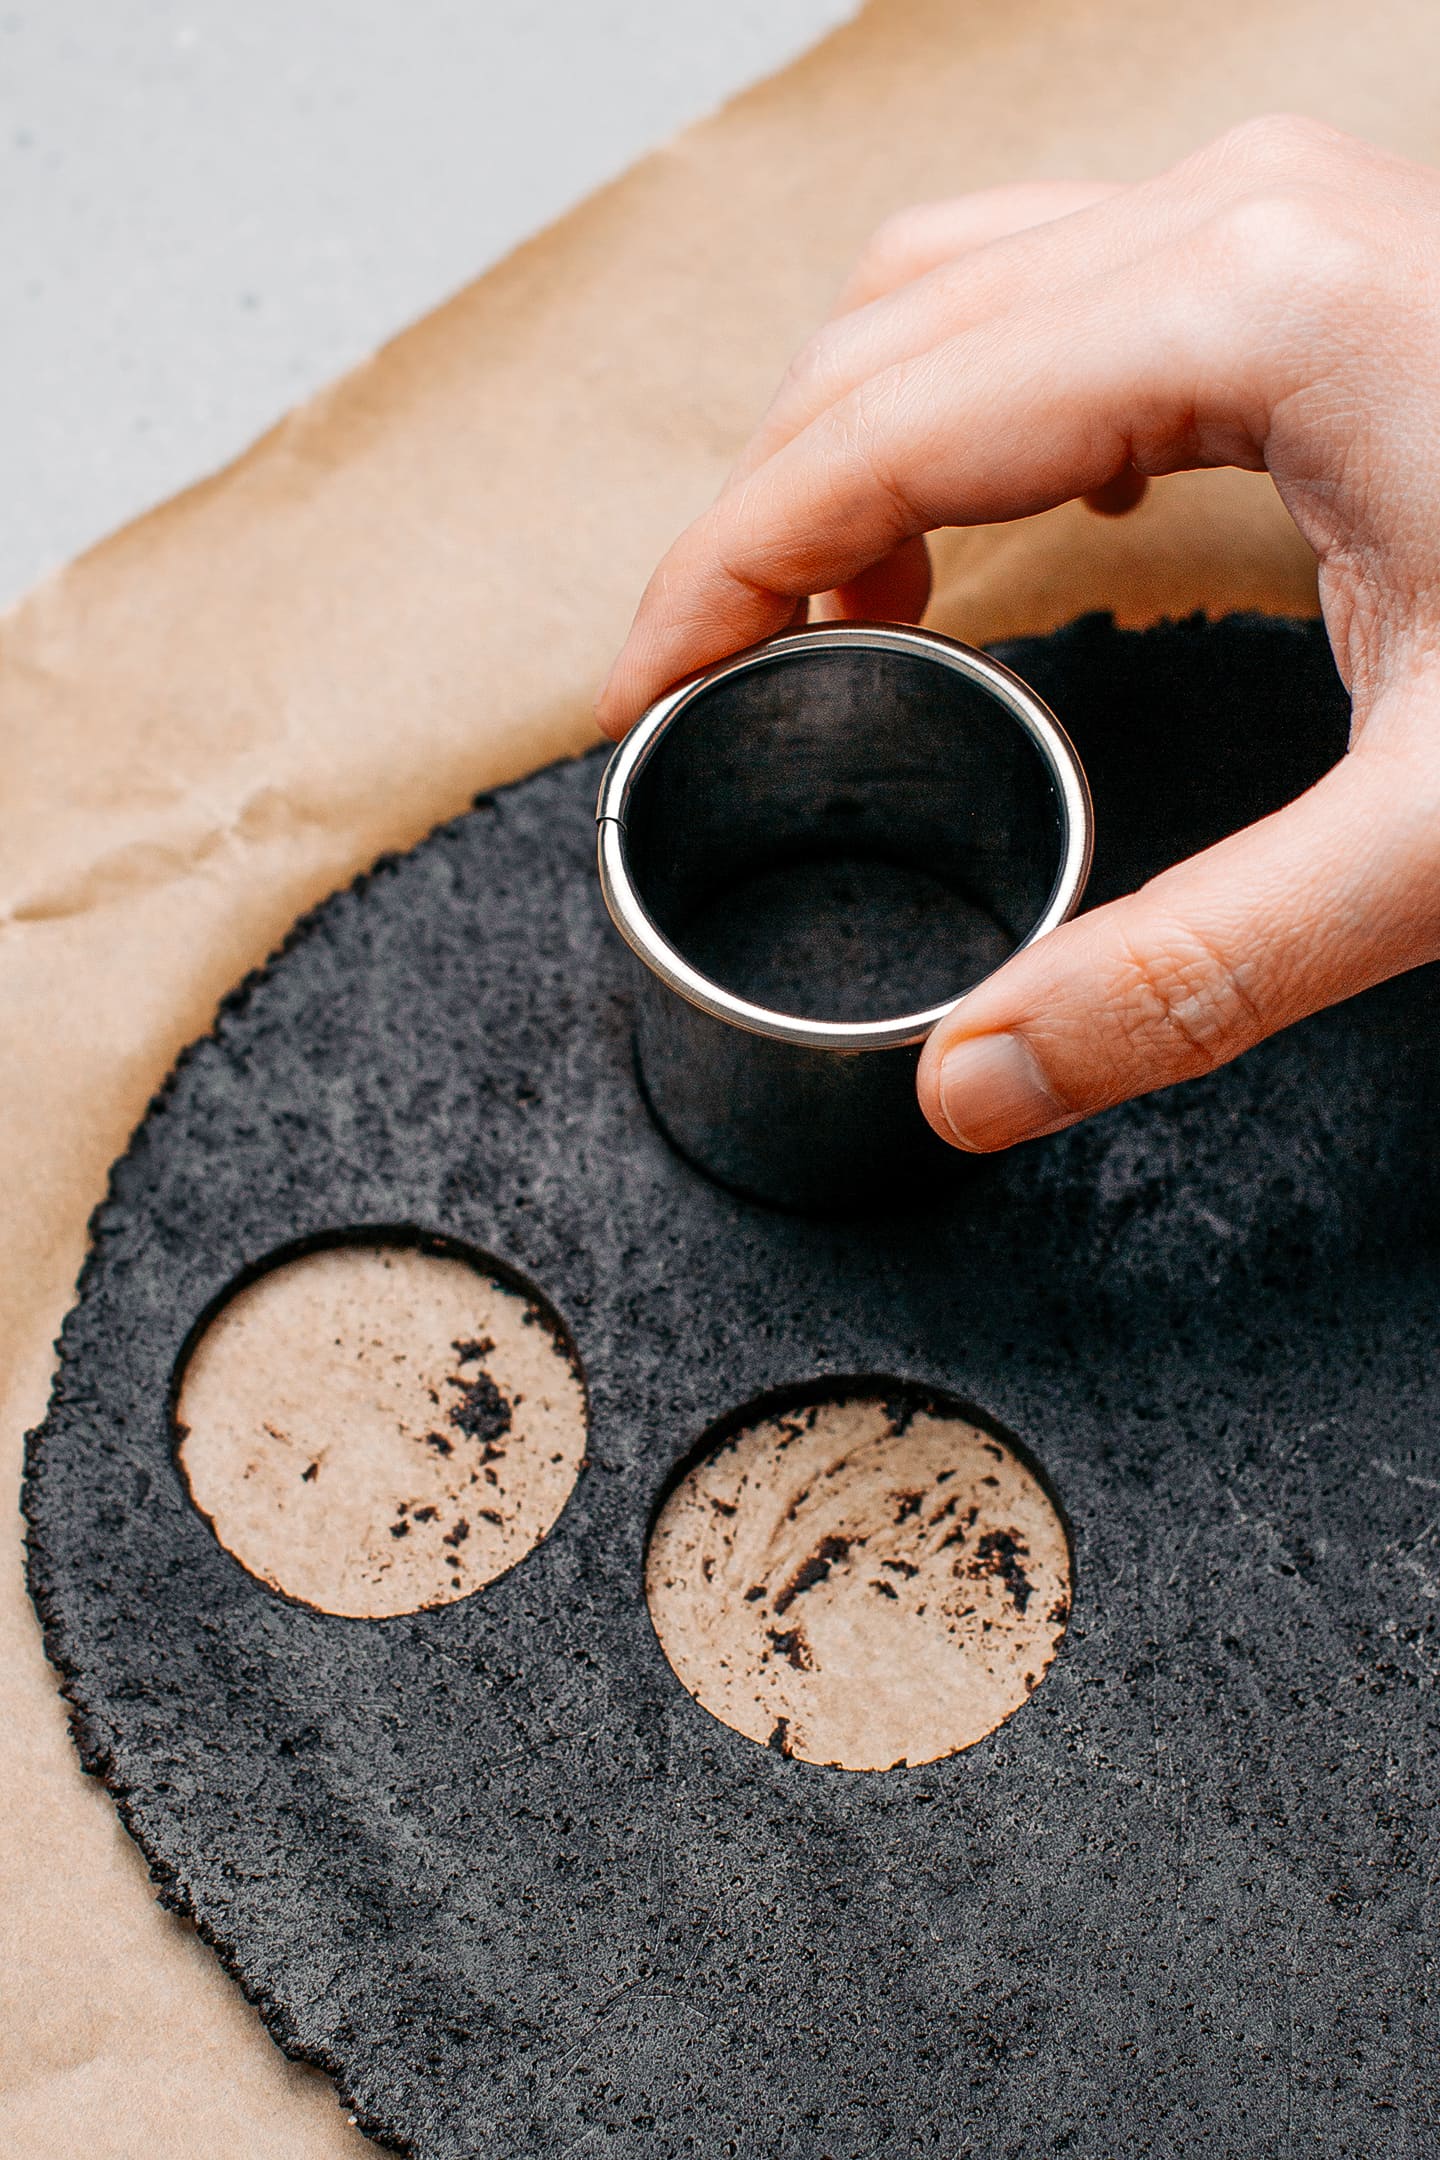
- Cut out cookies. Using a 2-inch cookie cutter, cut out cookies and place them on a baking sheet lined with parchment paper. There is no need to leave much space between each as they will not spread much.
3. Bake
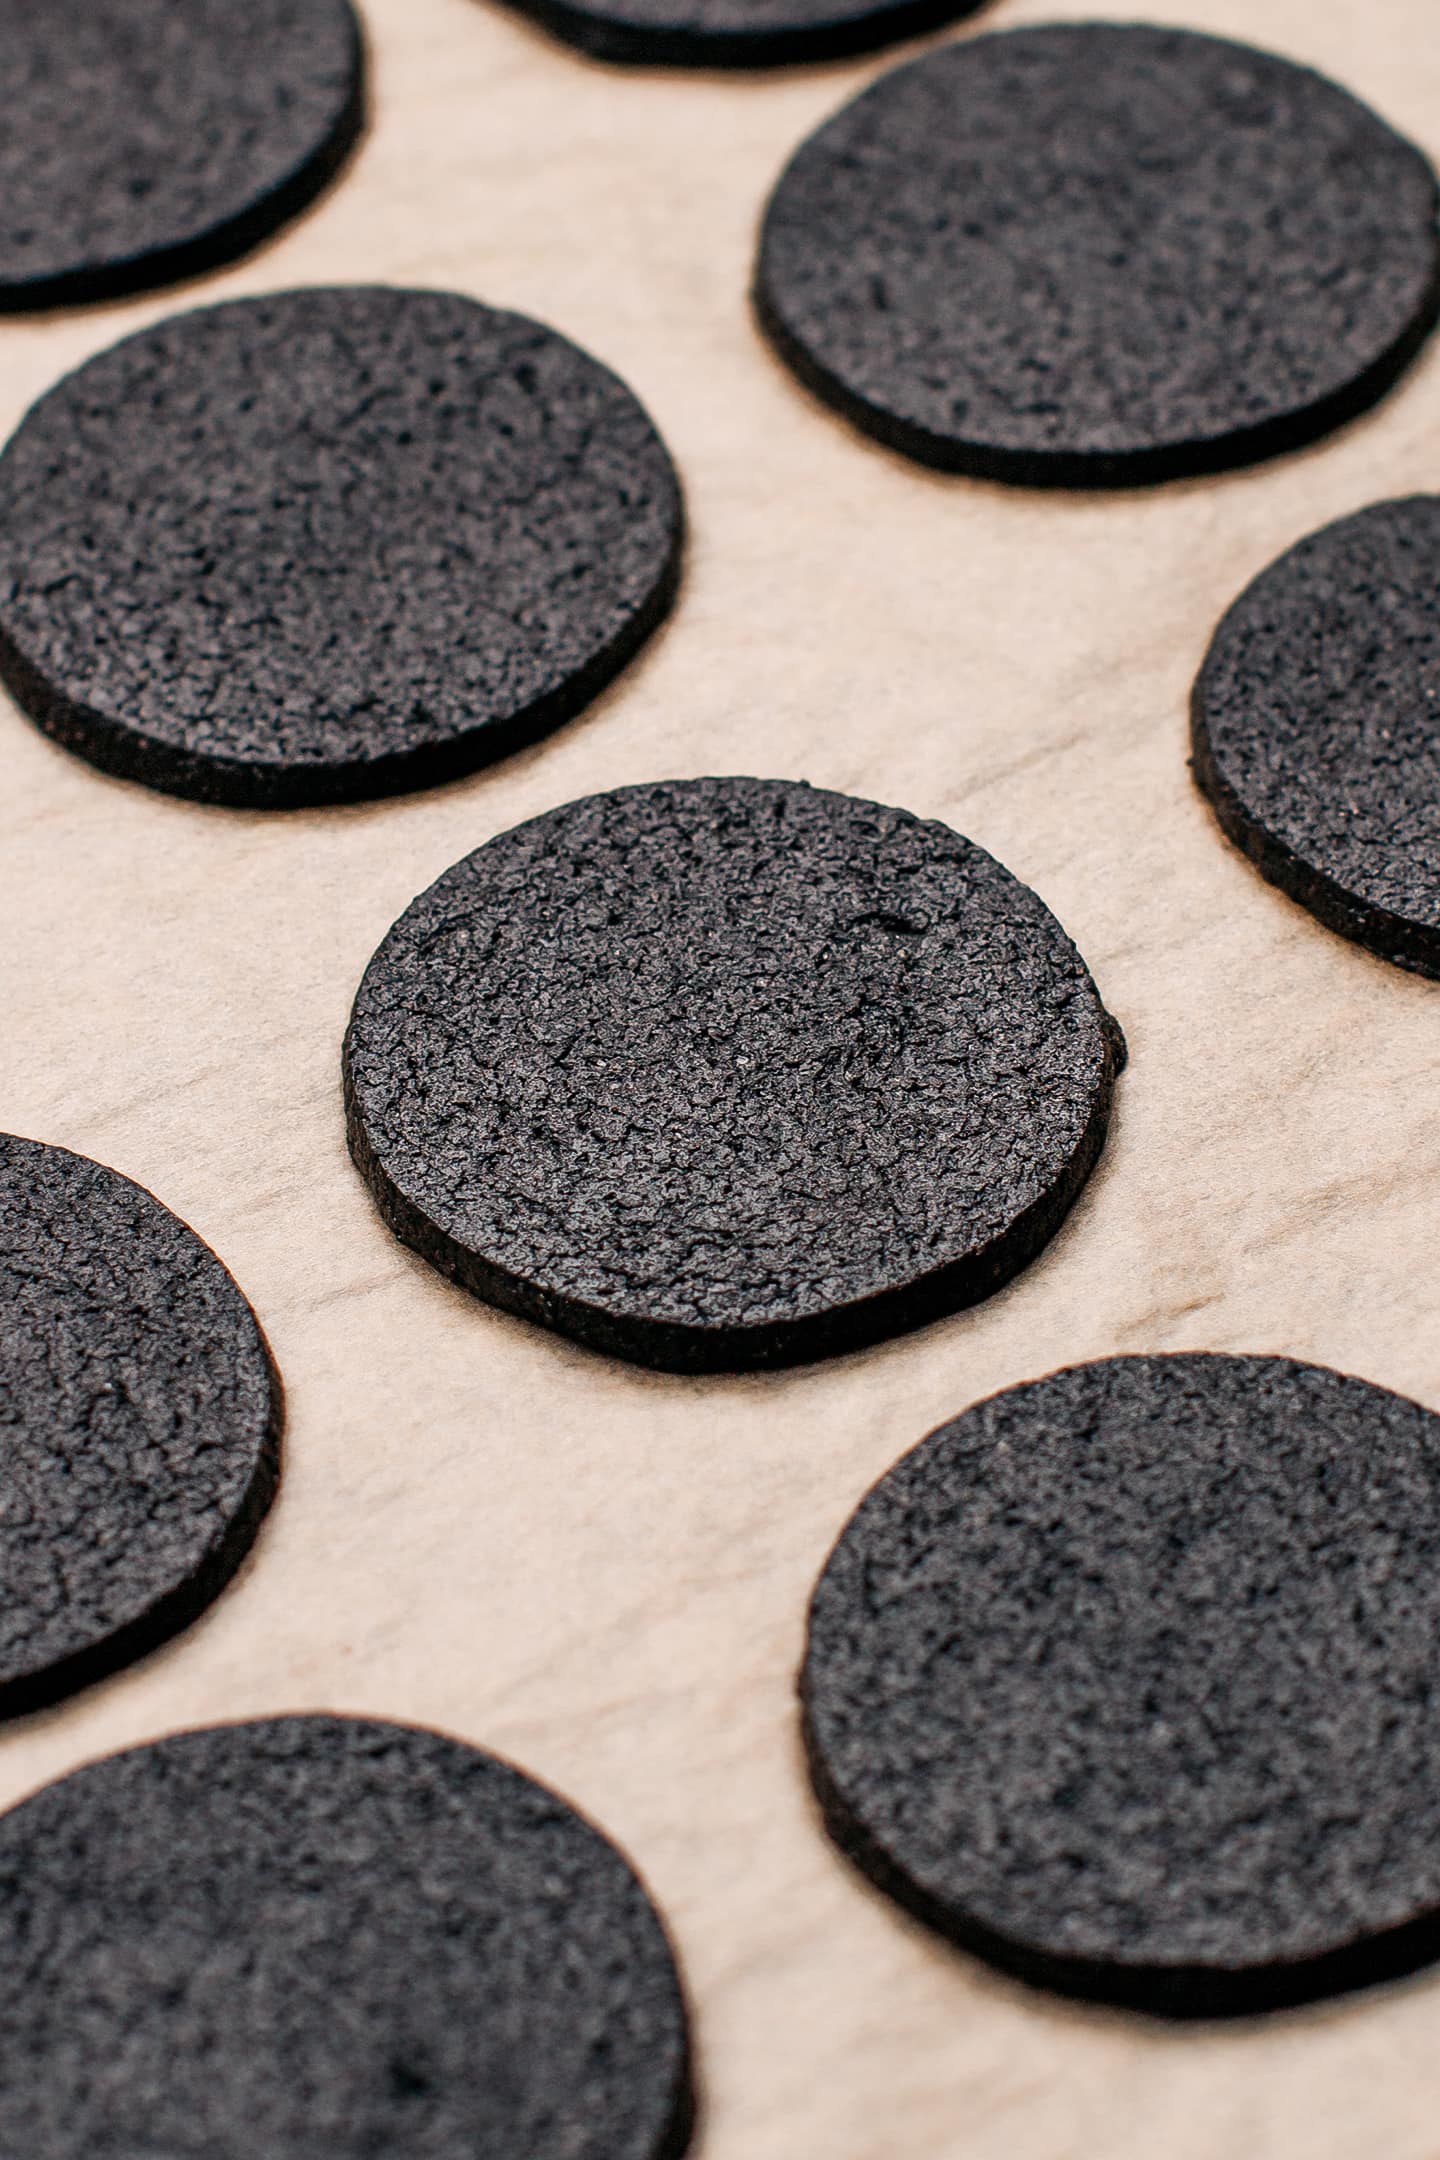
- Bake. Bake the cookies in a 325°F (160°C) preheated oven for about 11 minutes.
- Let them cool. After removing the cookies from the oven, let them cool completely before garnishing them with the vanilla filling.

4. Assemble
- Prepare the vanilla cream. Add the room-temperature coconut oil (it should be soft, not melted), powdered sugar, and vanilla extract to a stand mixer fitted with the flat beater attachment. Cream the coconut oil for 15-20 seconds or until it is fully combined with the sugar. Note: If the filling appears too dry, add more coconut oil.
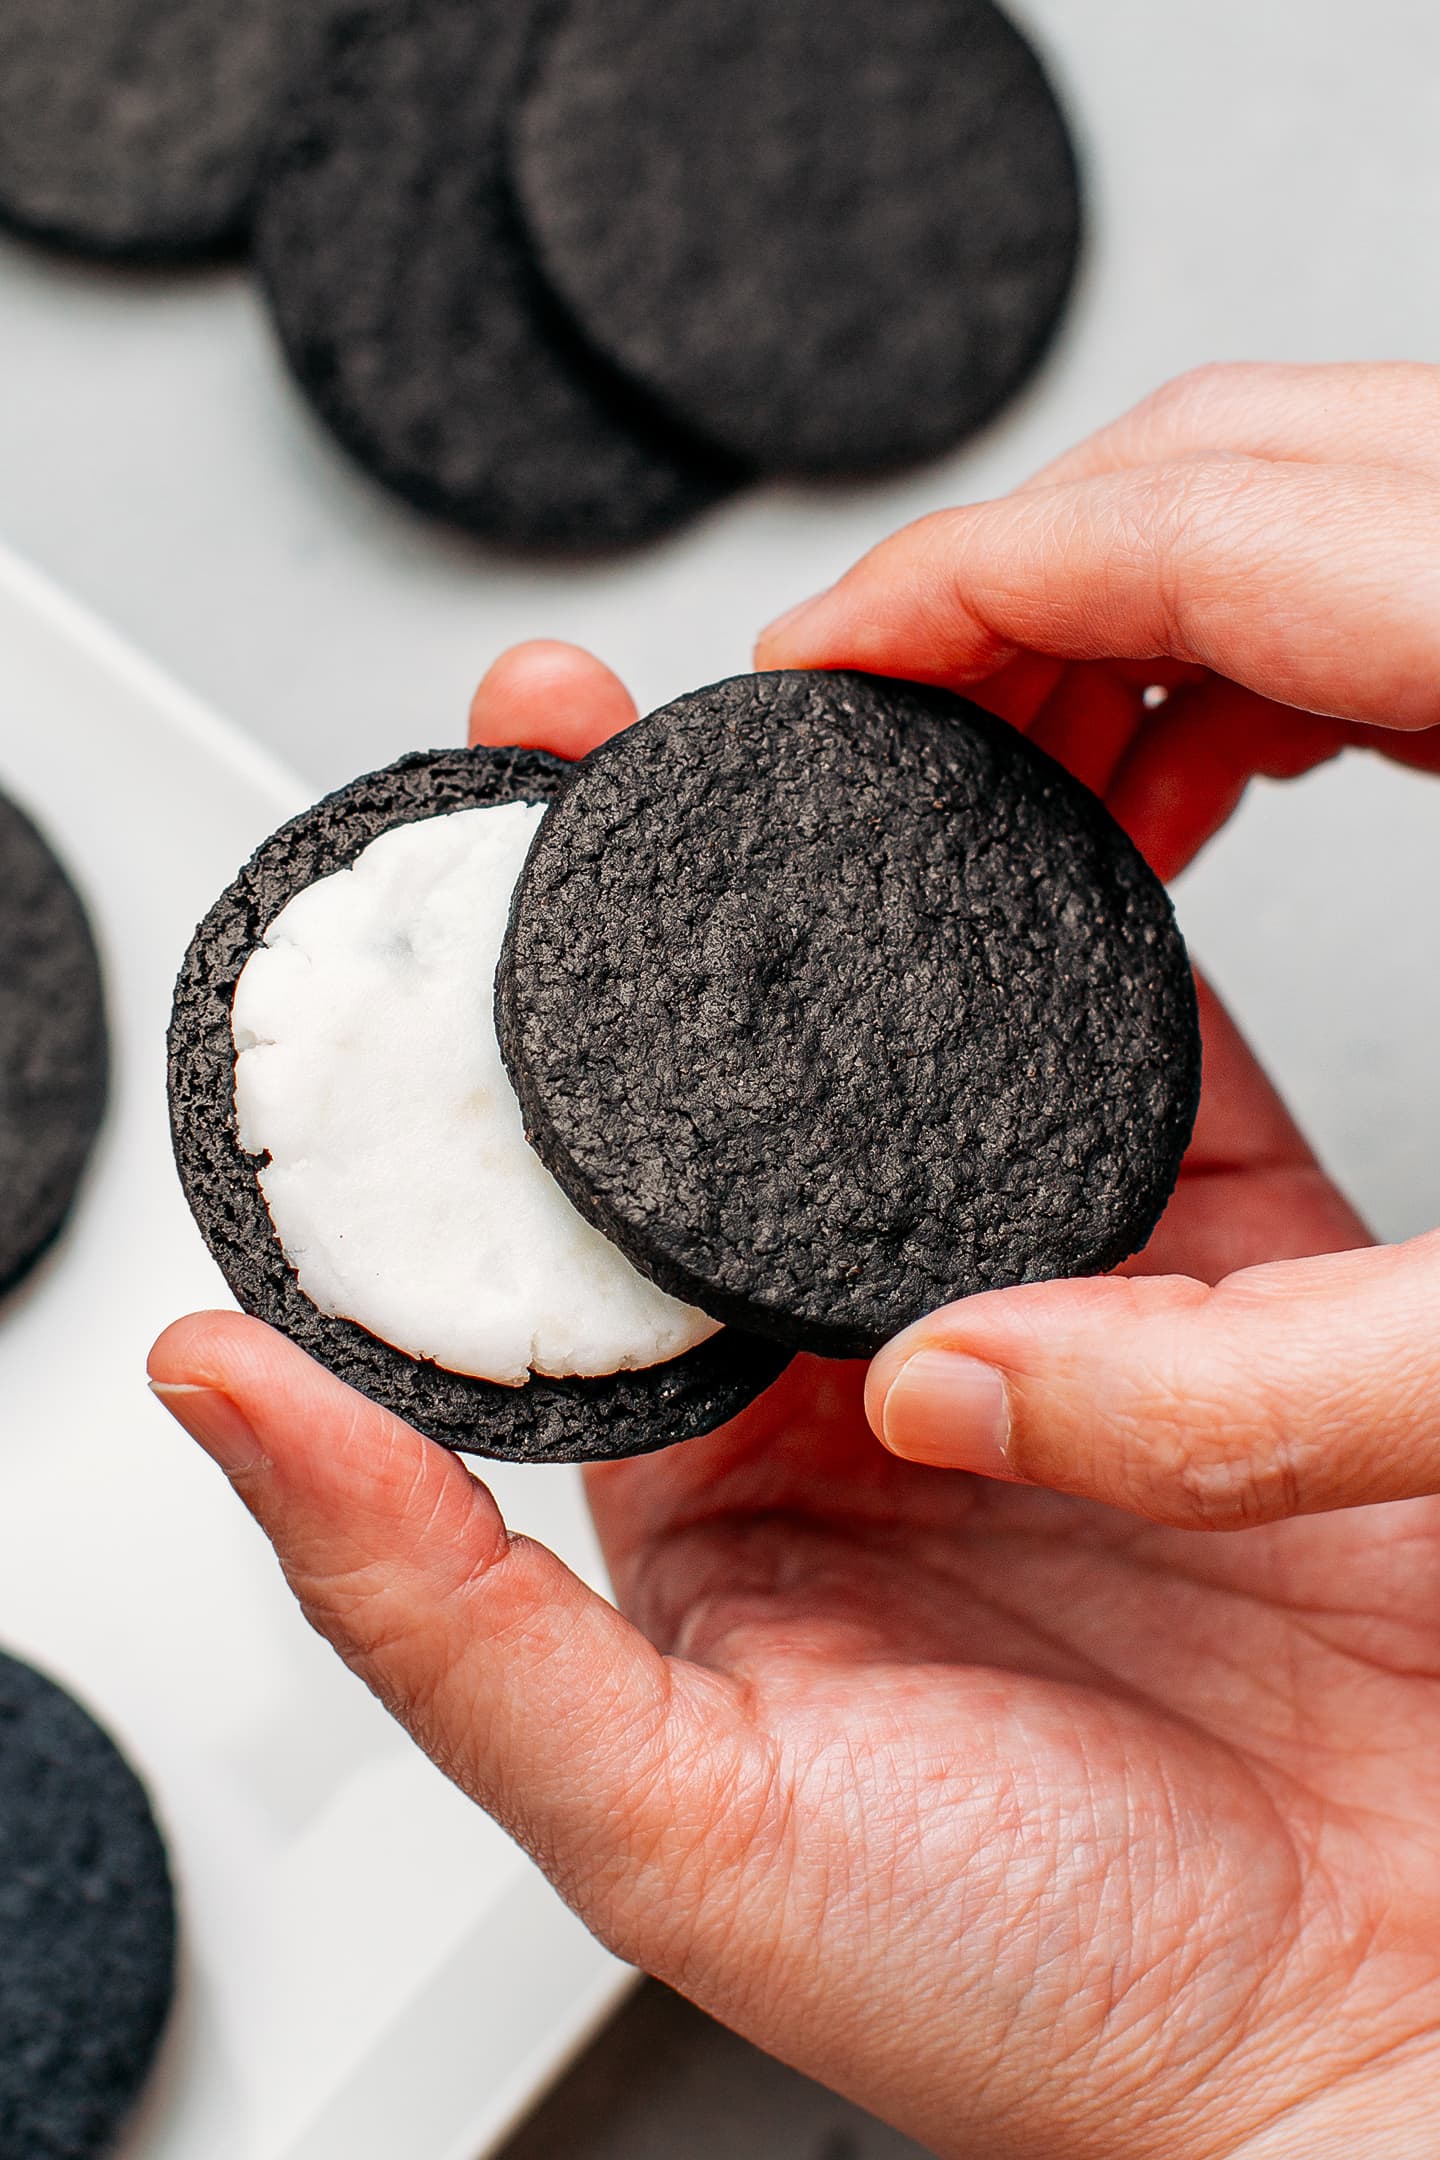
- Fill the cookies. Scoop out about 1 teaspoon of the vanilla cream. Shape it into a ball and slightly flatten it into a disc in your hand. Place the disc of vanilla cream on a chocolate cookie and carefully press it onto it. Finally, top with another cookie and slightly press it onto the cream to create a sandwich cookie. Repeat with the remaining cookies and filling, and enjoy!

📔 Tips
- Adjust the amount of black cocoa powder. Not all brands of black cocoa powder are equal, so you might have to slightly adjust the amount to get the desired color.
- Do not omit chilling the flattened dough. Make sure to chill the dough before cutting out the cookies, as skipping this step can make it difficult to cut them out. After chilling, the dough is firmer and easier to work with. If the dough is still too soft, place it in the freezer for 10-15 minutes.
- Use an embossed rolling pin. To decorate your cookies and give them even more texture, feel free to use an embossed wooden rolling pin!
- Do not overbake. As these cookies are very dark in color, you won’t be able to tell if they are done judging by their color. Hence, I recommend baking a small batch and giving them a taste test. The cookies must be crispy all the way through and not bitter.
- Let the cookies cool. Do not try to fill the cookies if they are still warm, as the filling will melt.
🥥 Variations
If you are bored of the classic flavor, here are some filling variations for you to try:
- Double-stuffed Oreos: Use 2 teaspoons of the vanilla filling instead of 1 to make double-stuffed Oreos.
- Peppermint Oreos: Add a few drops of peppermint extract to the filling for a fresh and minty flavor.
- Coconut Oreos: Use regular coconut oil and replace a few tablespoons of the powdered sugar with finely shredded coconut.
- Nutty Oreos: Incorporate chopped nuts such as hazelnuts, almonds, or peanuts into the filling.
- Coffee Oreos: Add 1/2 teaspoon of instant espresso for a toasted note.

🥛 What to Serve It With
You can enjoy these homemade Oreo cookies as is or dip them in plant-based milk such as almond milk, oat milk, or hazelnut milk. Want to go all black? How about serving these Oreos with black sesame milk?
❄️ Storing and Freezing
- To store: You can keep these cookies for up to 10 days in an airtight container at room temperature.
- To freeze: Place the cookies in a freezer bag and freeze for up to 2 months. Thaw at room temperature.
💬 FAQ
Yes, you can keep the flattened dough in the refrigerator for up to 3 days.
You didn’t bake them for long enough. Add 1 or 2 minutes of baking time and let them cool completely as they crisp up as they cool.
If you ever wanted to recreate homemade Oreos at home, you are going to love this recipe! These vegan Oreos are crispy, super chocolatey, and have a fresh and buttery vanilla cream filling!


⭐️ Did you like this recipe? Let us know in the comments below, and tag us on Facebook, Instagram, or Pinterest!


Want to Save This Recipe?
Enter your email below & we’ll send it straight to your inbox! Plus, you will receive new recipes every week!
I’d like to receive more tips & recipes from Full of Plants.
This site is protected by reCAPTCHA and the Google Privacy Policy and Terms of Service apply.
Homemade Oreo Cookies (Vegan)
Ingredients
Cookies
- 1/2 cup vegan butter at room temperature
- 1/2 cup granulated sugar
- 6 tbsp unsweetened cocoa powder
- 2 tbsp unsweetened dark cocoa powder
- 1/4 tsp baking powder
- 1/2 tsp salt
- 1 cup all-purpose flour
- 2 tbsp almond milk
- 1/4 tsp vanilla extract
Vanilla Cream Filling
- 3 tbsp deodorized coconut oil not melted
- 1/2 cup powdered sugar
- 1/4 tsp vanilla extract
Instructions
Cookies
- Cream the butter. Add the diced butter and sugar to a stand mixer fitted with the flat beater attachment. Cream the butter with the sugar on medium speed for about 2 minutes or until fully combined.
- Add the cocoa powders. Next, add both types of cocoa powder, baking powder, and salt. Cream for another 20-30 seconds.
- Add the flour. Add the flour, almond milk, and vanilla extract. Knead for another 30 seconds. At this point, the dough should have the texture of cookie dough.
- Flatten. Transfer the dough to a piece of parchment paper. Top with another layer of parchment paper and flatten the dough into a 1/8-inch (3-4mm) thickness using a rolling pin. Try to make the dough as even as possible.
- Chill. Place the flattened dough on a baking sheet or flat plate and chill it in the refrigerator for about 2 hours. You can speed up this process by freezing it for about 20 minutes.
- Preheat the oven to
 325 °F (160°C).
 - Cut out cookies. Using a 2-inch cookie cutter, cut out cookies and place them on a baking sheet lined with parchment paper. There is no need to leave much space between each as they will not spread much.
- Bake. Bake the cookies for about 11 minutes. After removing the cookies from the oven, let them cool completely before garnishing them with the vanilla filling.

Assemble
- Prepare the vanilla cream. Add the room-temperature coconut oil (it should be soft, not melted), powdered sugar, and vanilla extract to a stand mixer fitted with the flat beater attachment. Cream the coconut oil for 15-20 seconds or until it is fully combined with the sugar. Note: If the filling appears too dry, add more coconut oil.
- Fill the cookies. Scoop out about 1 teaspoon of the vanilla cream. Shape it into a ball and slightly flatten it into a disc in your hand. Place the disc of vanilla cream on a chocolate cookie and carefully press it onto it. Finally, top with another cookie and slightly press it onto the cream to create a sandwich cookie. Repeat with the remaining cookies and filling, and enjoy!
- You can keep the cookies for up to 10 days in an airtight container at room temperature.
Notes
- Adjust the amount of black cocoa powder. Not all brands of black cocoa powder are equal, so you might have to slightly adjust the amount to get the desired color.
- Do not omit chilling the flattened dough. Make sure to chill the dough before cutting out the cookies, as skipping this step can make it difficult to cut them out. After chilling, the dough is firmer and easier to work with. If the dough is still too soft, place it in the freezer for 10-15 minutes.
- Use an embossed rolling pin. To decorate your cookies and give them even more texture, feel free to use an embossed wooden rolling pin!
- Do not overbake. As these cookies are very dark in color, you won’t be able to tell if they are done judging by their color. Hence, I recommend baking a small batch and giving them a taste test. The cookies must be crispy all the way through and not bitter.
- Let the cookies cool. Do not try to fill the cookies if they are still warm, as the filling will melt.
Nutrition

About the Author
Thomas Pagot is the founder, photographer, and recipe developer behind Full of Plants. He created the blog in 2016 as a personal cookbook for vegan recipes. Through years of recipe development, Thomas has successfully grown Full of Plants into a trusted resource for plant-based recipes.

FREE VEGAN RECIPES EBOOK!
Join our newsletter to get your FREE 100-page printable eBook! You’ll also get new recipes delivered by email weekly.
Leave a Comment
I never liked the filling in Oreos, so this recipe is PERFECT for me!! I won’t be filling them and enjoying my cookies plain!! Thanks for this!
You are welcome Kris, hope you will like them!
Amazing recipe. I can’t say how much I loved Oreo Cookies. But this vegan’s one is a new taste for me. Thank you for sharing.
Thanks Emy!