This post may contain affiliate links. Please read our disclosure policy.
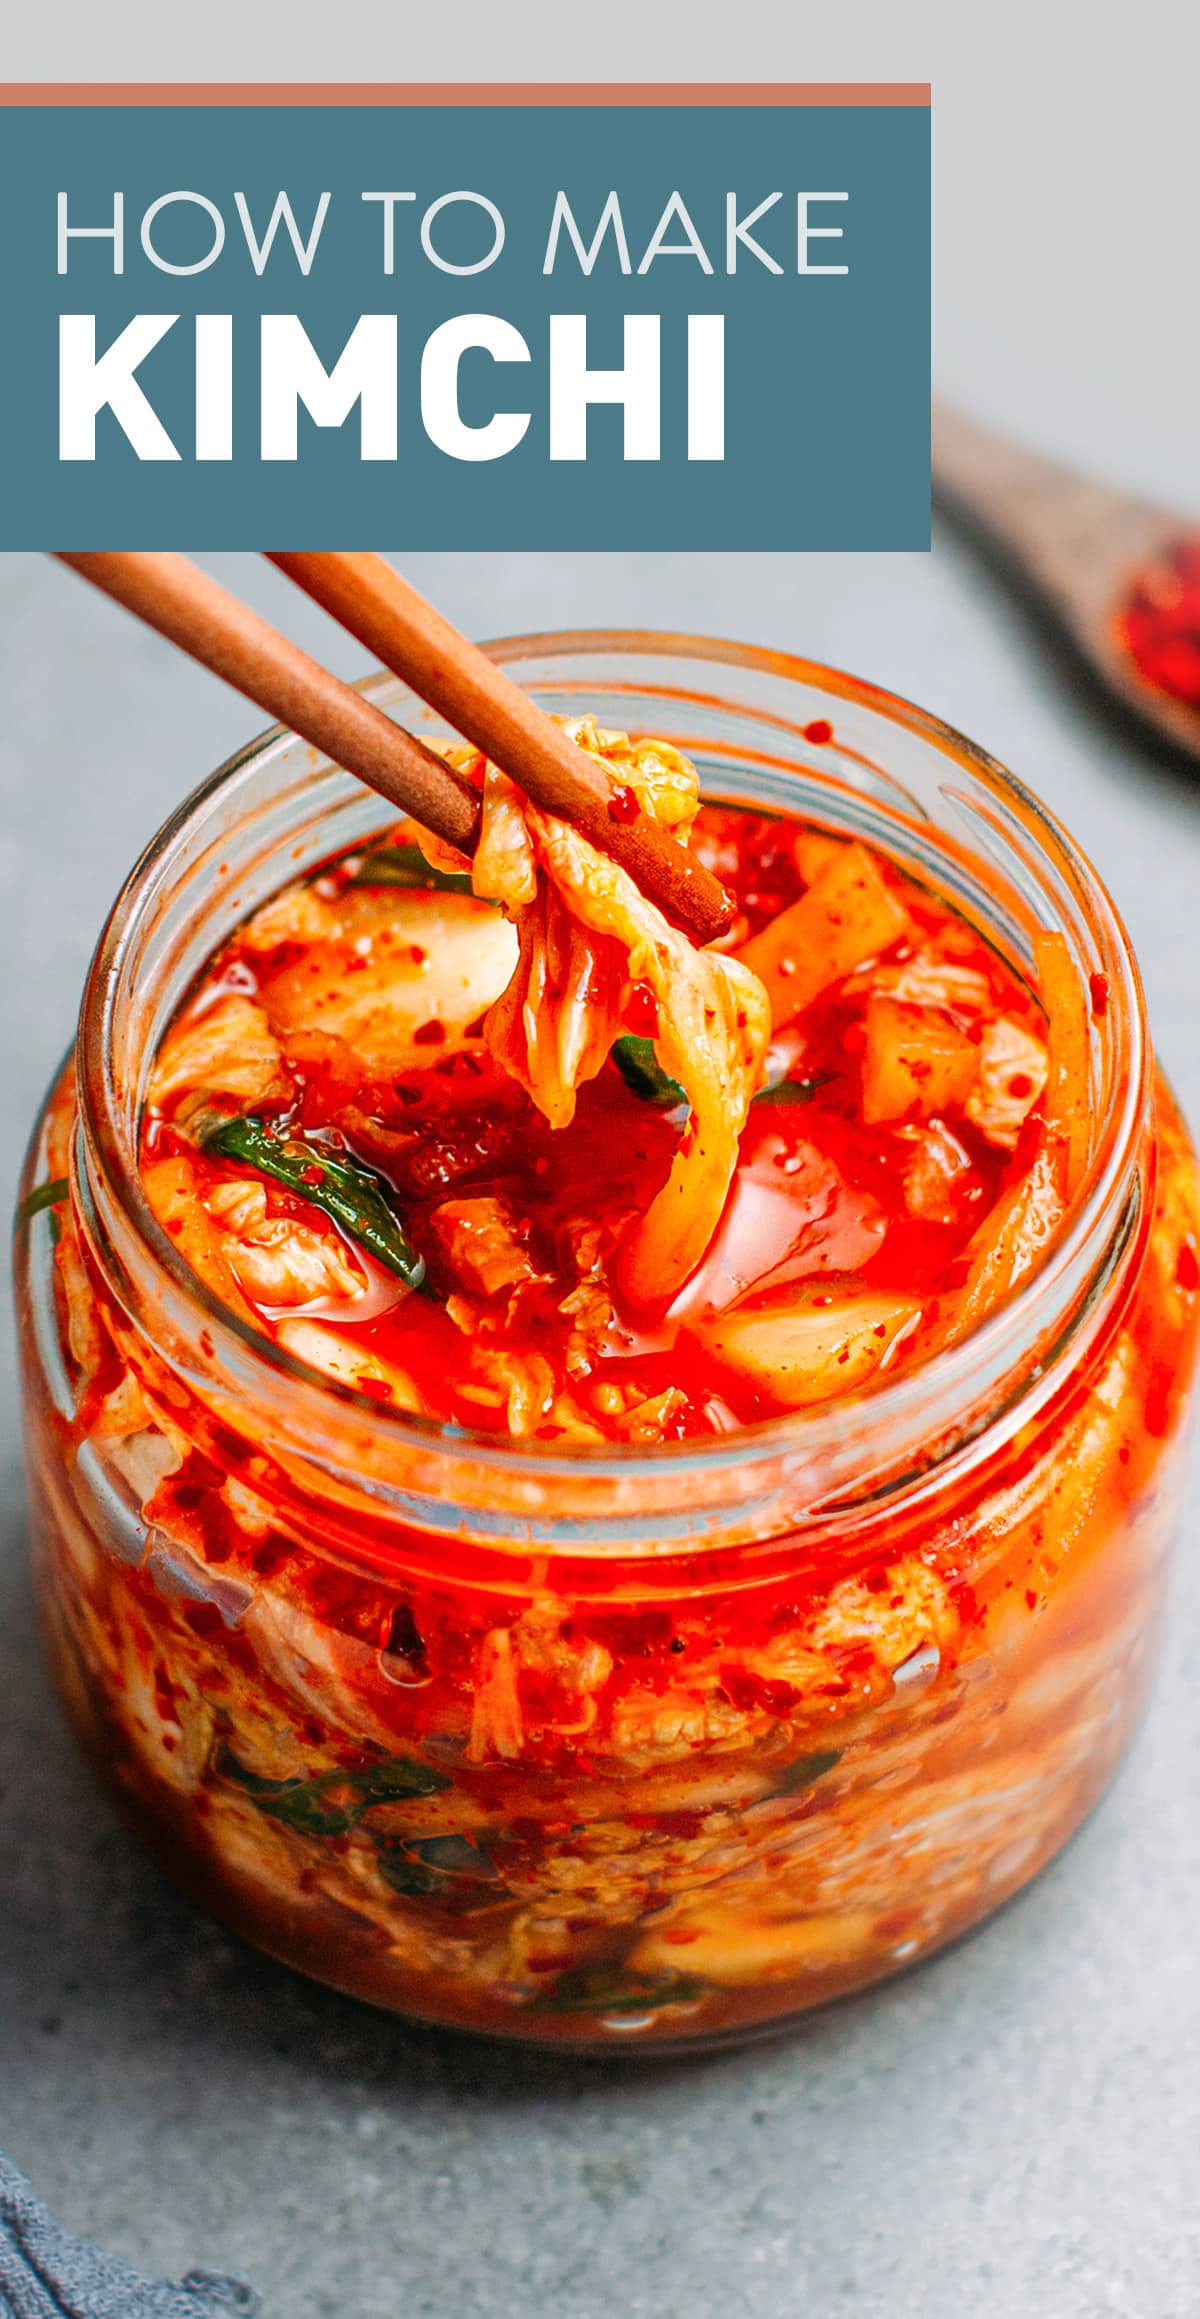
Learn how to make your own vegan kimchi at home! This Korean-inspired condiment is sour, spicy, and delicious on top of rice, in soups, savory pancakes, and more! Plant-based, easy to make, and just 10 ingredients!

⭐️ Why You Should Try This Recipe
- Cheaper and better than store-bought. Homemade kimchi is not only more affordable, but it also tastes so much better than the store-bought versions. Plus, you know exactly what is inside.
- Easy and customizable. You can easily adjust your kimchi’s spiciness, sweetness, and saltiness by playing with the ratio of ingredients.
- Tried and tested multiple times. We have made this kimchi recipe repeatedly, sometimes every week for a couple of months, so we can safely say that it works every single time!
- It yields a lot of juice. Aren’t you tired of the kimchi recipes that leave you with no juice? We were, too! This kimchi recipe gives you a lot of juice that can be used to make sauces, dipping sauces, and more!
- Versatile. You can keep this kimchi for weeks in the refrigerator and use it in many recipes. From kimchi fried rice to kimchi pancakes and dumplings, the possibilities are endless.
📘 What is Kimchi
Kimchi (김치) is a traditional Korean condiment made of fermented Napa cabbage. It is usually seasoned with garlic, ginger, and chili flakes. It is a staple in Korean cuisine and used in many dishes, from soups to stir-fries, savory pancakes, dumplings, and more.
Kimchi is low-calorie, packed with probiotics and nutrients, and contains many antioxidants. It is said that Kimchi may help boost your immune system and improve digestion.
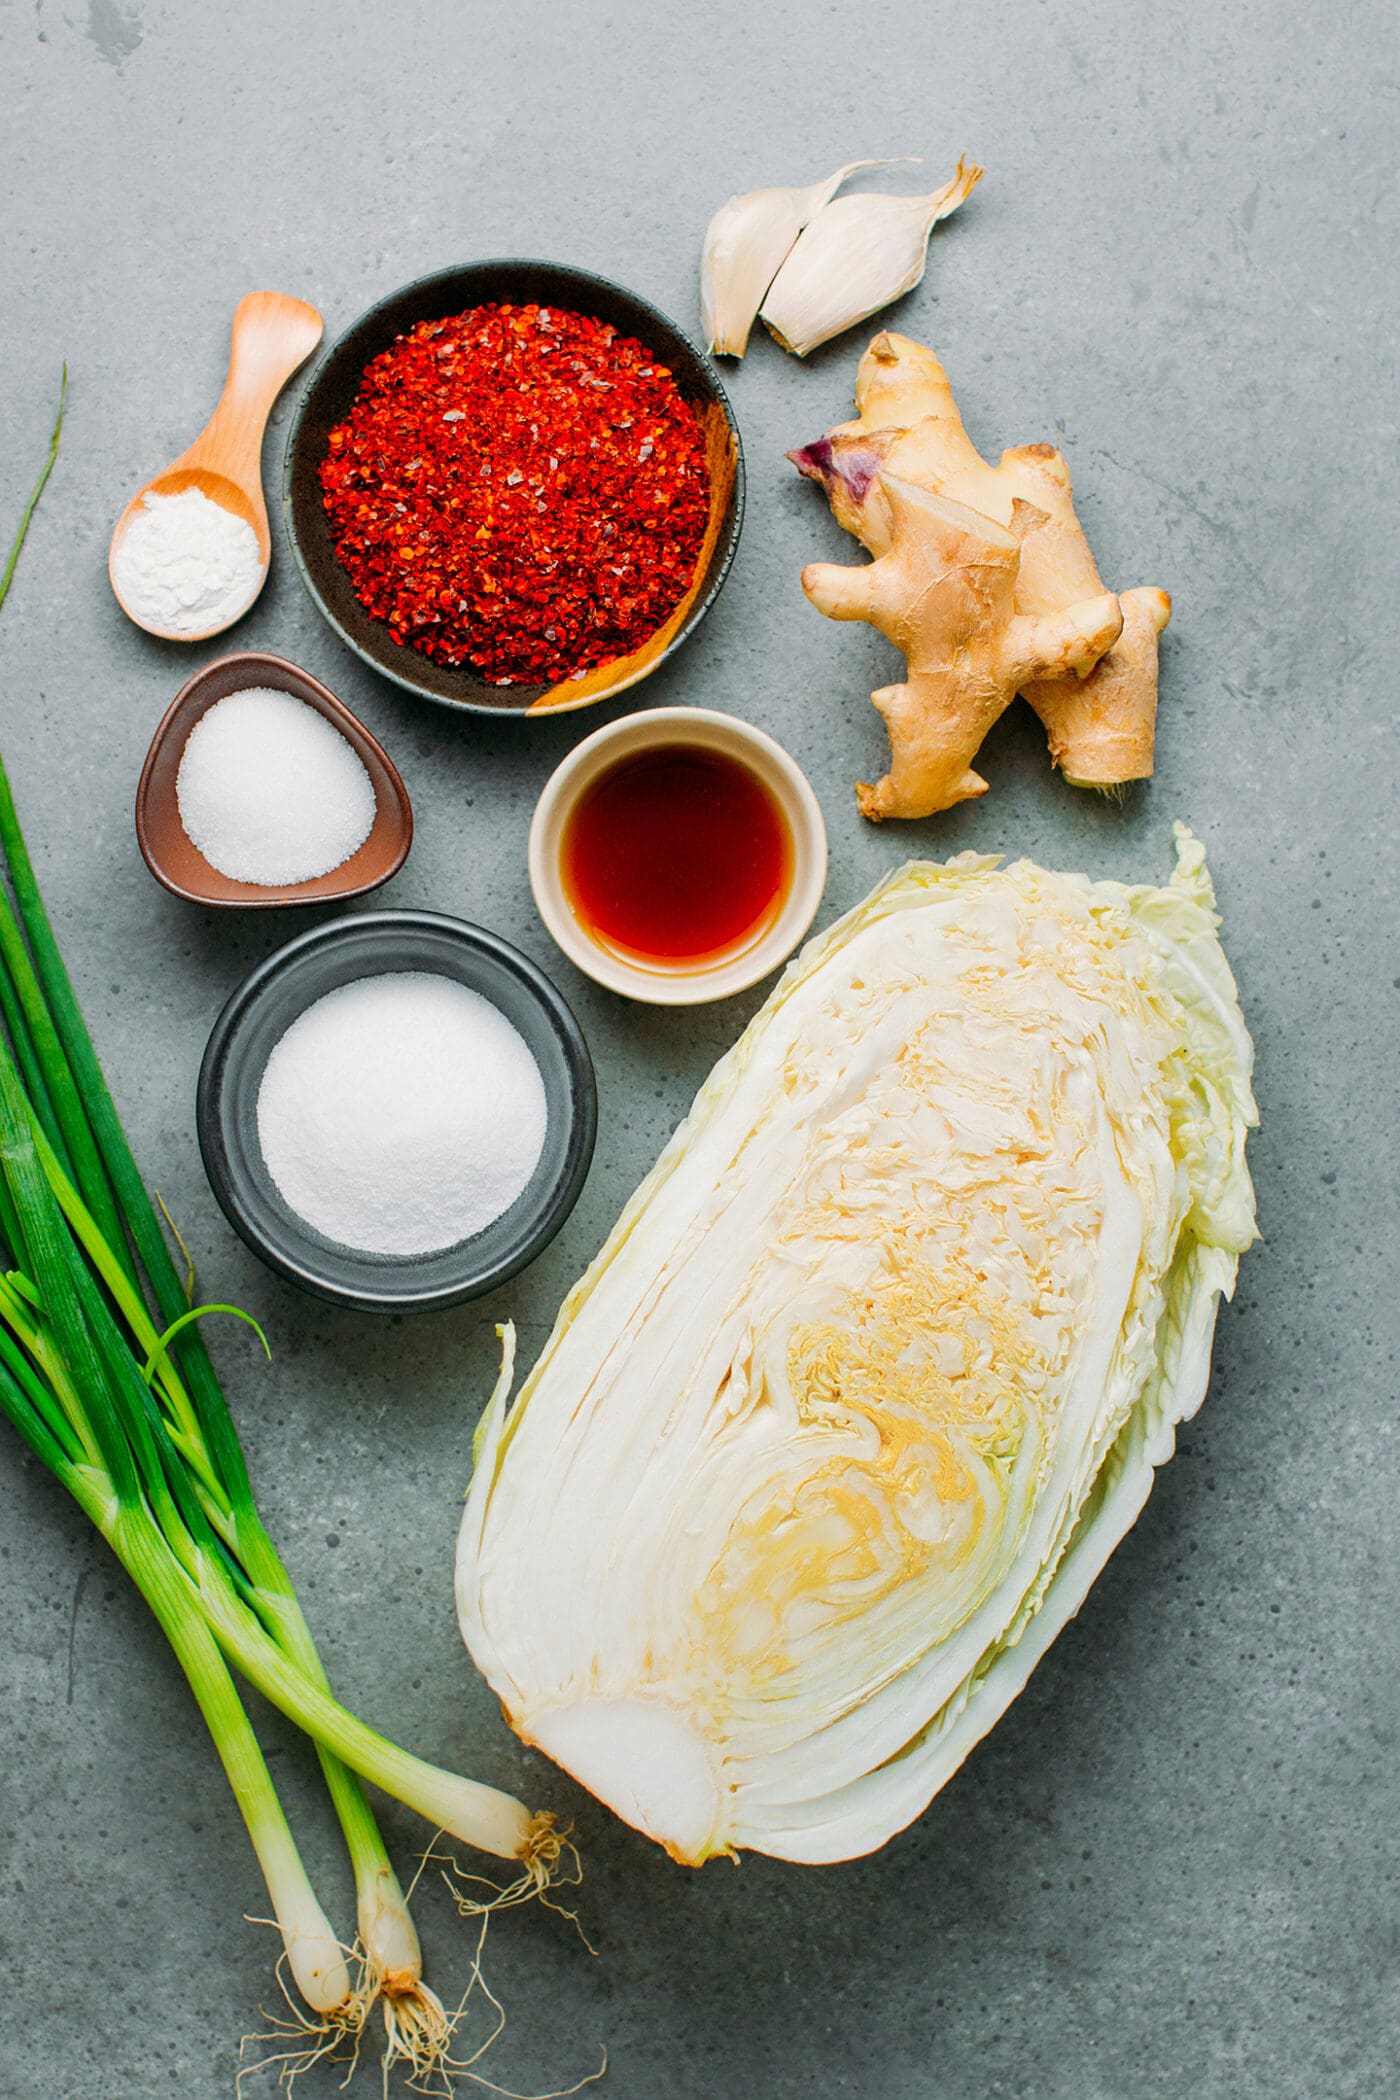
🥬 Ingredient Notes
Making kimchi at home is very easy and requires basic ingredients. Here is what you will need:
- Napa cabbage – Sometimes called Chinese cabbage. I went with one large head here.
- Daikon radish – For extra crunch. If you do not have daikon radish, you can use carrots.
- Gochugaru – Also known as Korean chili flakes. This chili powder has an intense red color and a smoky flavor. It is essential to get that specific kimchi flavor. There is no substitute for it.
- Garlic and ginger – Use very fresh ginger for the best results.
- Scallions – I went with scallions, but you can use half scallions and half green onions.
- Carrots – Optional, it is not essential to this recipe, and I didn’t use any here.
- Vegan fish sauce – For saltiness and extra umami. You can get vegan fish sauce online or make your own vegan fish sauce. Otherwise, regular soy sauce works great as well.
- Sugar – I am using a slightly higher amount of sugar than most recipes here. It yields, in my opinion, a better flavor and balances perfectly with the saltiness and sourness of the kimchi.
- Sweet rice flour – Known as glutinous rice flour, it will help the chili paste thicken.
Tools Needed
To make this recipe, you will need large glass jars. If you make 1 batch, I recommend using 2 one-quart mason jars or 3 16-oz glass jars.
🥣 How to Make Kimchi
1. Prepare the Cabbage
- Slice the cabbage. Start by cutting the cabbage in quarters lengthwise. Remove the hard core part and discard. Using a large knife, cut each quarter into 1-inch wide strips.
- Rinse it. Once done, rinse the cabbage a few times under cold water to remove possible dirt. Transfer the rinsed and drained cabbage to a large bowl.
- Coat with salt. Add the salt and massage the cabbage with the salt using your hands or two spatulas.

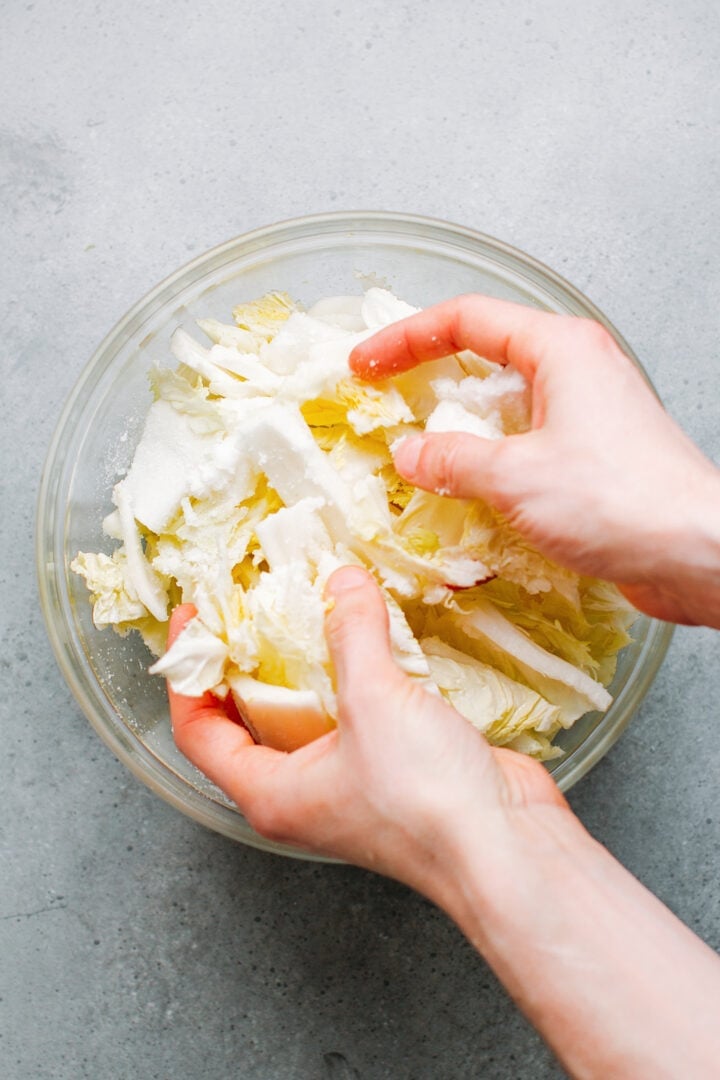
- Let it rest. Cover the bowl with plastic wrap and let the cabbage rest for about 3 hours. This step will allow the cabbage to release some water and soak up some of the salt.
- Drain and rinse. After 3 hours, drain the cabbage, but keep the brine (we will use it later). Rinse the cabbage twice under cold water, but do not squeeze it. Just give it a rinse.
- Add the other vegetables. Transfer the drained cabbage to a large mixing bowl and add the sliced daikon radish and green onions. Toss well to combine.
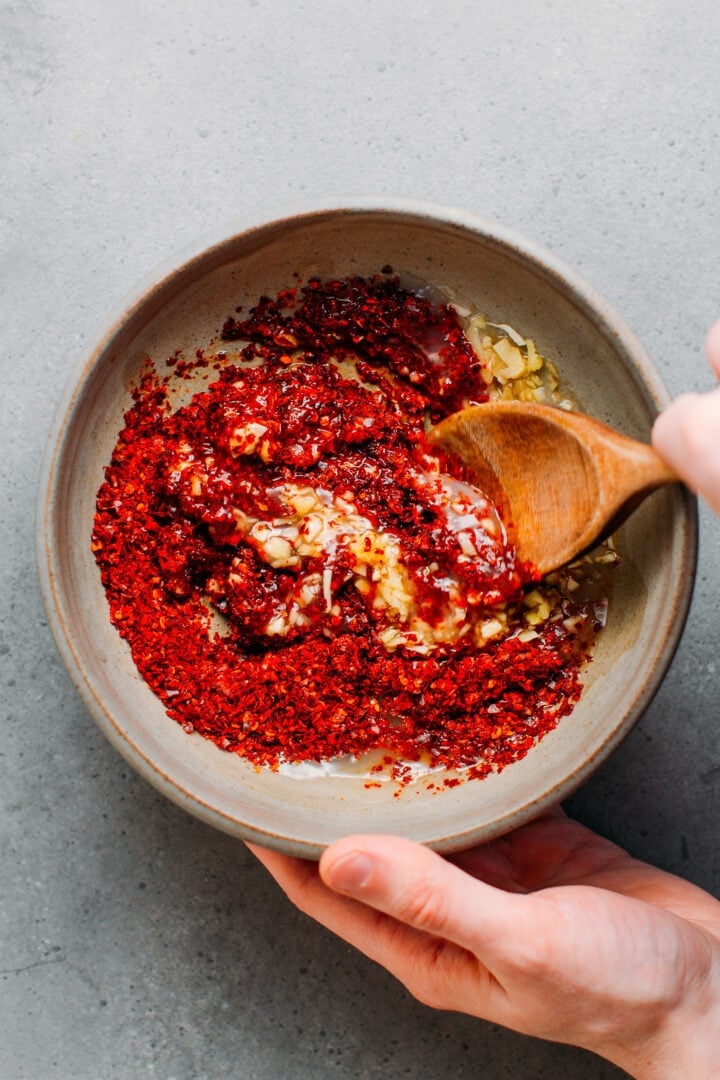
2. Make the Chili Paste
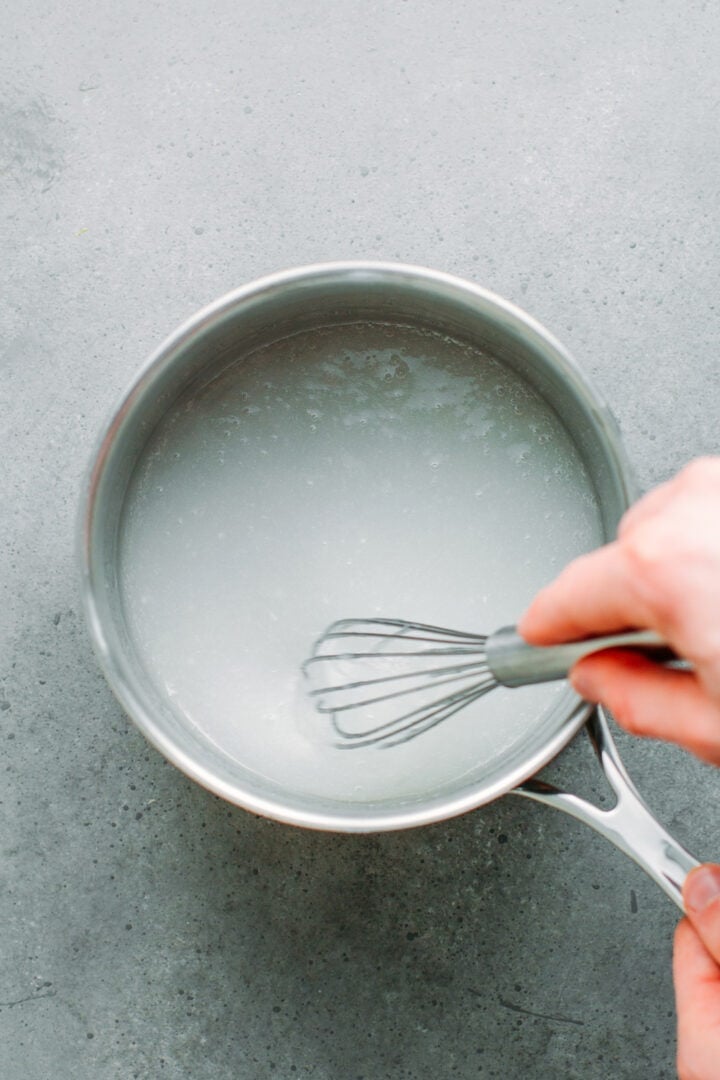
While the cabbage is resting, prepare the chili paste:
- Make a paste. Add water, sugar, and sweet rice flour to a saucepan. Heat over medium heat, whisking constantly until it thickens. This thick liquid will make the base of the chili paste and will allow it to coat the cabbage better.

- Season it. Combine the paste with the Korean chili flakes, vegan fish sauce, minced garlic, and minced ginger. The chili paste is now ready to use.
Note: While some recipes call for apples and onions to be blended with the sauce, I found out not all authentic recipes have these. I went with a simple version here and omitted those.
3. Coat the Cabbage
The next step consists of coating the cabbage with the chili paste.
- Add the chili paste to the cabbage. Pour the chili paste over the drained cabbage and toss to coat the vegetables very well with the paste. You can use your hands (with gloves) to massage the cabbage or use wooden spoons.

4. Fermentation
Finally comes the fun part: the fermentation!
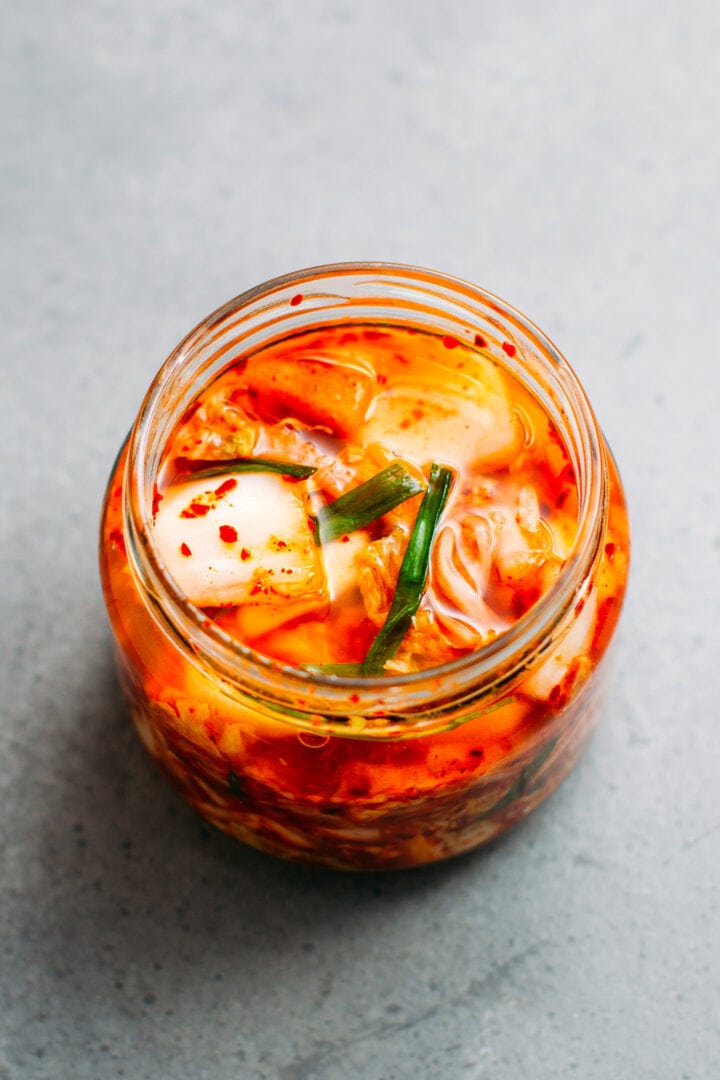
- Transfer to jars. Transfer the cabbage to clean glass jars and pack it very well. You only want to fill the jars to 2/3 or 3/4, as the cabbage will slightly expand as it ferments. I used 2 one-quart jars but any glass jar will work.
- Cover with juice. Next, pour in about 1/4 cup of the reserved brine on top of the packed cabbage into each jar. Cover with a lid, but do not screw it completely. You want to allow some air to escape.
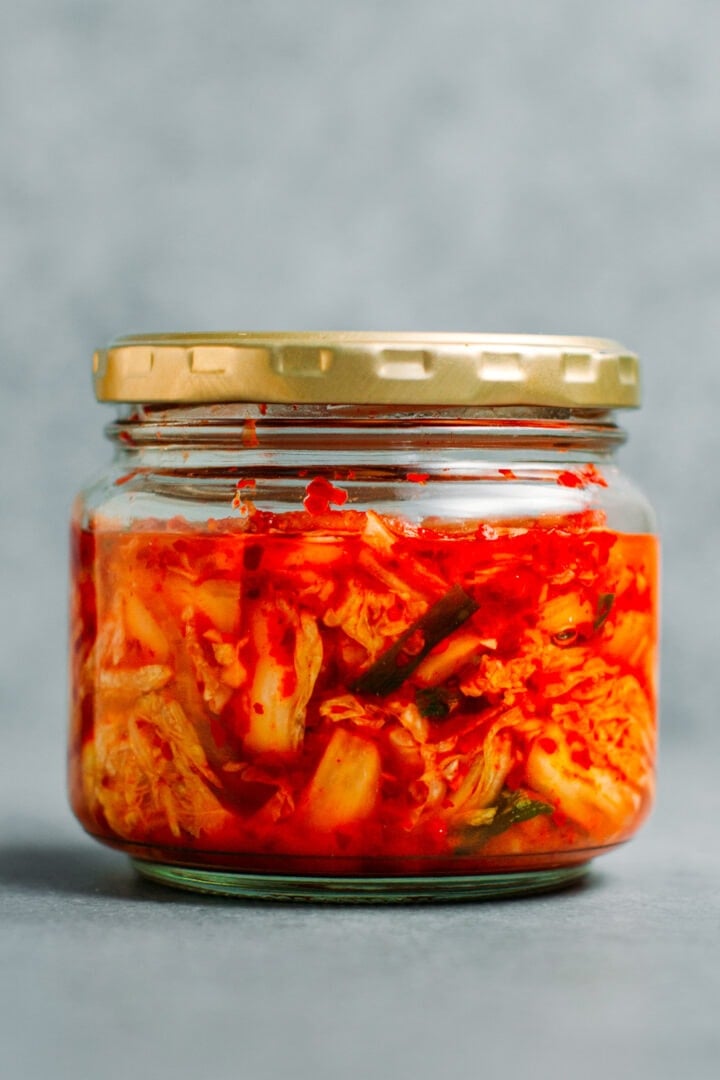
- Let it ferment. Place the jars in a dark place at room temperature (about 65-70°F). Let the kimchi ferment for about 48 hours or until it has a tangy flavor and you can see some bubbles in the jar.
- Refrigerate. At this point, transfer the jars to the refrigerator and let them rest for another 3-5 days before eating. It will allow the flavors to merge and develop.
🍜 Where to Use It
Kimchi is incredibly versatile! You can use it on top of rice, stir it into noodles, soups, stir-fries, make kimchi fried rice, and so much more!
🌶 Vegan Kimchi Recipes
If you are looking for recipe ideas to use your brand-new homemade kimchi, I have got you covered!


- Vegan Kimchi Noodle Soup: This vegan kimchi noodle soup is infused with a wonderful blend of spiciness, sweetness, and richness. The broth is flavored with kimchi, ginger, and garlic, and paired with tender tofu, mushrooms, and greens.
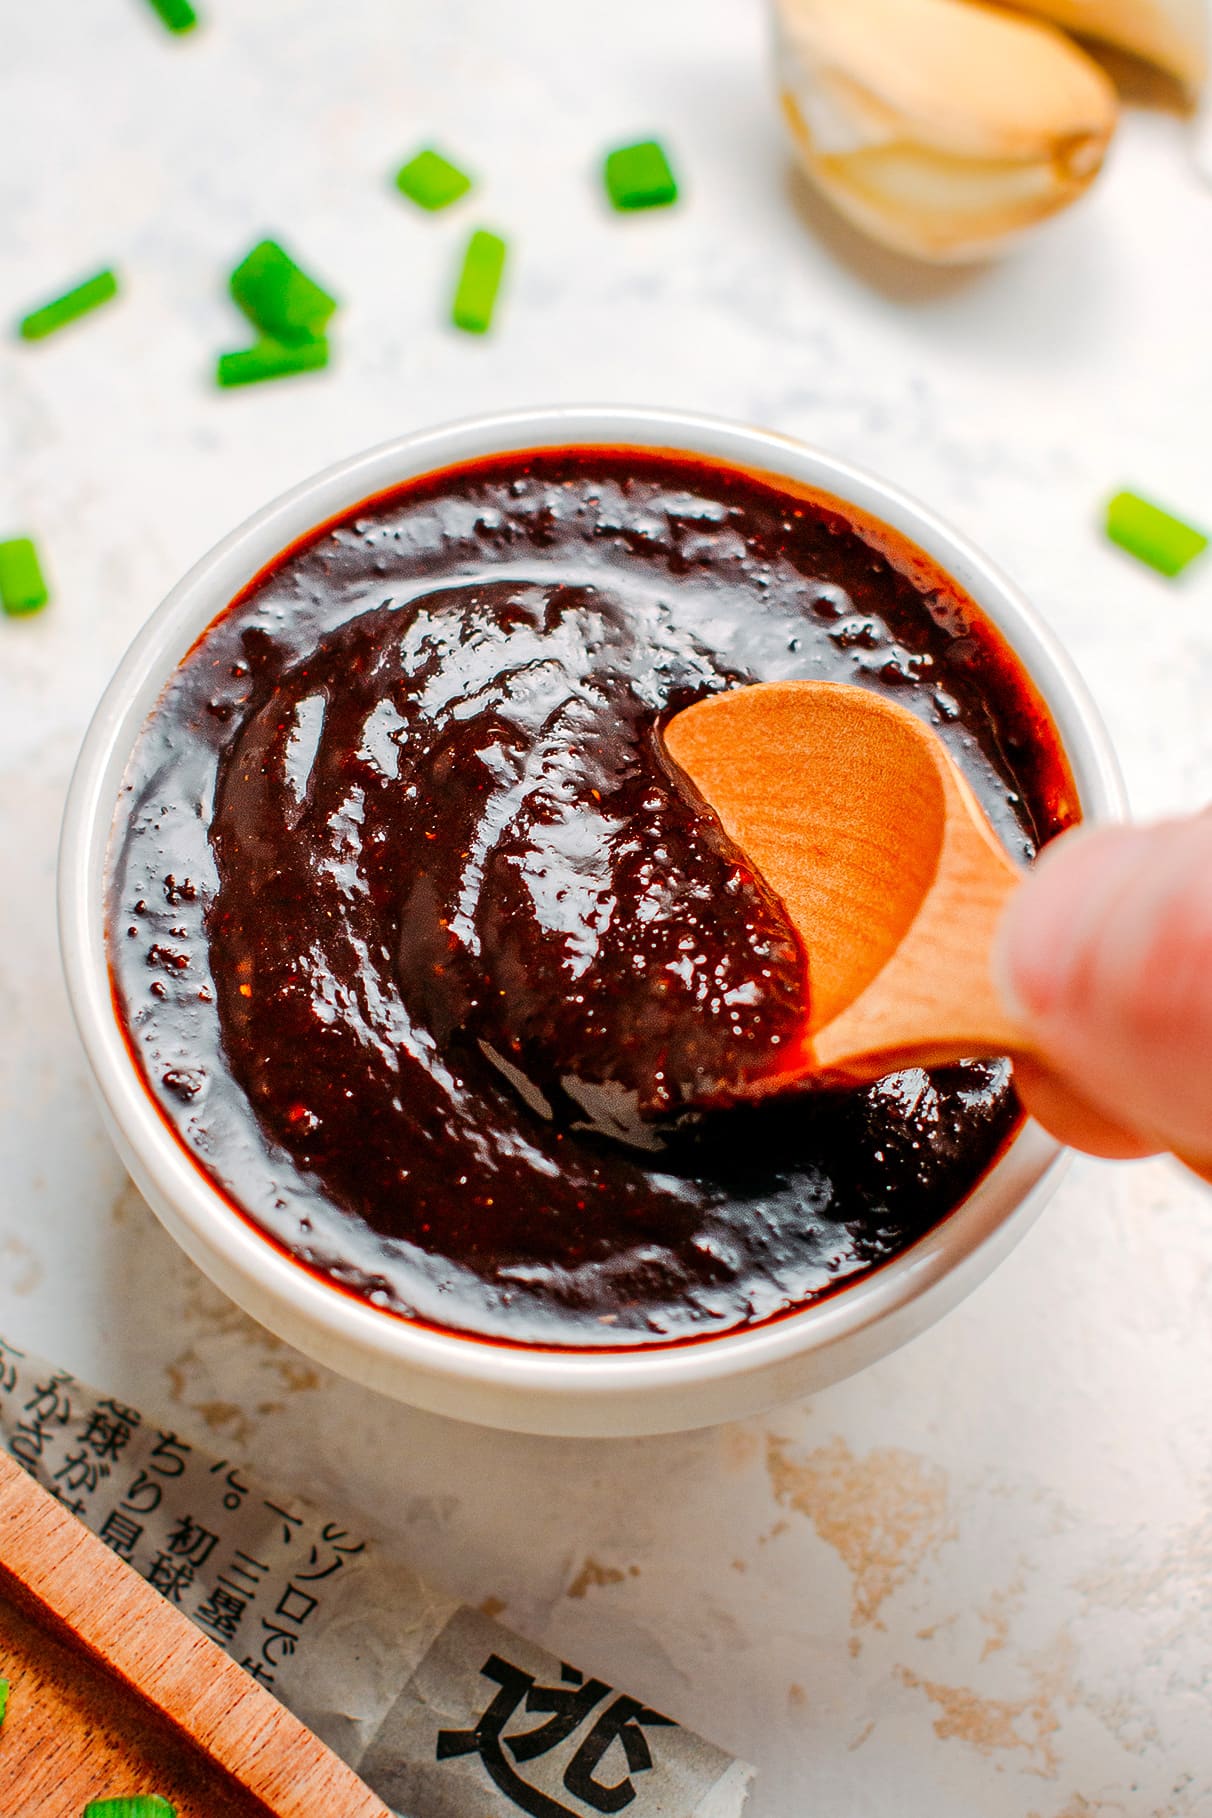
- Vegan Kimchi Dumplings: Delicious Korean-inspired dumplings filled with kimchi, tofu, vegan ground meat, bean sprouts, and green onions! Plus, it comes with a unique kimchi dipping sauce!
- Tofu Kimchi Stew: Spicy, sweet & sour kimchi stew with chewy tofu that comes together in less than 30 minutes! So warming and flavorful! Vegan + just six ingredients!
- Vegan Kimchi Quiche: This rustic quiche features a rich, creamy filling with kimchi and scallions baked in a buttery and flaky homemade crust! It is subtly spicy and tangy, and requires just 10 ingredients!
📔 Tips
- Do not fill the jars to the top. Leave at least 1/3 to let the kimchi expand a little bit. As it ferments, the kimchi will expand.
- If you are not used to spicy food, reduce the amount of gochugaru. This recipe yields kimchi that is quite spicy. Use half of the chili powder for milder kimchi.
- After 1 day, push the cabbage back into the brine. Cabbage tends to rise above the surface in the beginning. Use a spoon to submerge it in the brine.
- At first, the brine will be very liquid. This is totally normal. It will thicken as it sits.
- Do not leave it at room temperature for too long. I found that 48 hours at room temperature (at about 68°F) was the perfect fermentation time to get a nice sourness.

❄️ Storing & Freezing
- To store: You can keep kimchi in the refrigerator for up to 4 weeks. It can probably be kept longer than that, but I haven’t tried it. The longer you let it sit, the more sour it becomes.
- To freeze: Transfer the kimchi to freezer-safe containers or bags and freeze for up to 3 months. Thaw overnight in the refrigerator before using.
💬 FAQ
The short answer is yes. This recipe is based on Korean recipes. Be aware that there is not just one authentic recipe, though, and each person has their own way of making it. This recipe has been tweaked to my taste.
Kimchi has a spicy and garlicky flavor with some sourness and just a hint of sweetness.
Your kimchi is ready when you can see some air bubbles forming in the brine. You can also tell by tasting it. It should be slightly sour, a little bit like pickles.
Yes, it does! Kimchi juice is perfect for making dipping sauces and adds extra flavor to soups, stews, marinades, and more!
Keep your kimchi jars in the refrigerator. Make sure the vegetables are always submerged in the brine.
You can keep kimchi for several weeks. Personally, my kimchi is always gone within 4 weeks, but it will definitely keep for longer than that.
If you ever wondered how to make kimchi at home, you should definitely try this recipe! It’s easy to make and tastes so much better than store-bought!


Want to Save This Recipe?
Enter your email below & we’ll send it straight to your inbox! Plus, you will receive new recipes every week!
I’d like to receive more tips & recipes from Full of Plants.
This site is protected by reCAPTCHA and the Google Privacy Policy and Terms of Service apply.
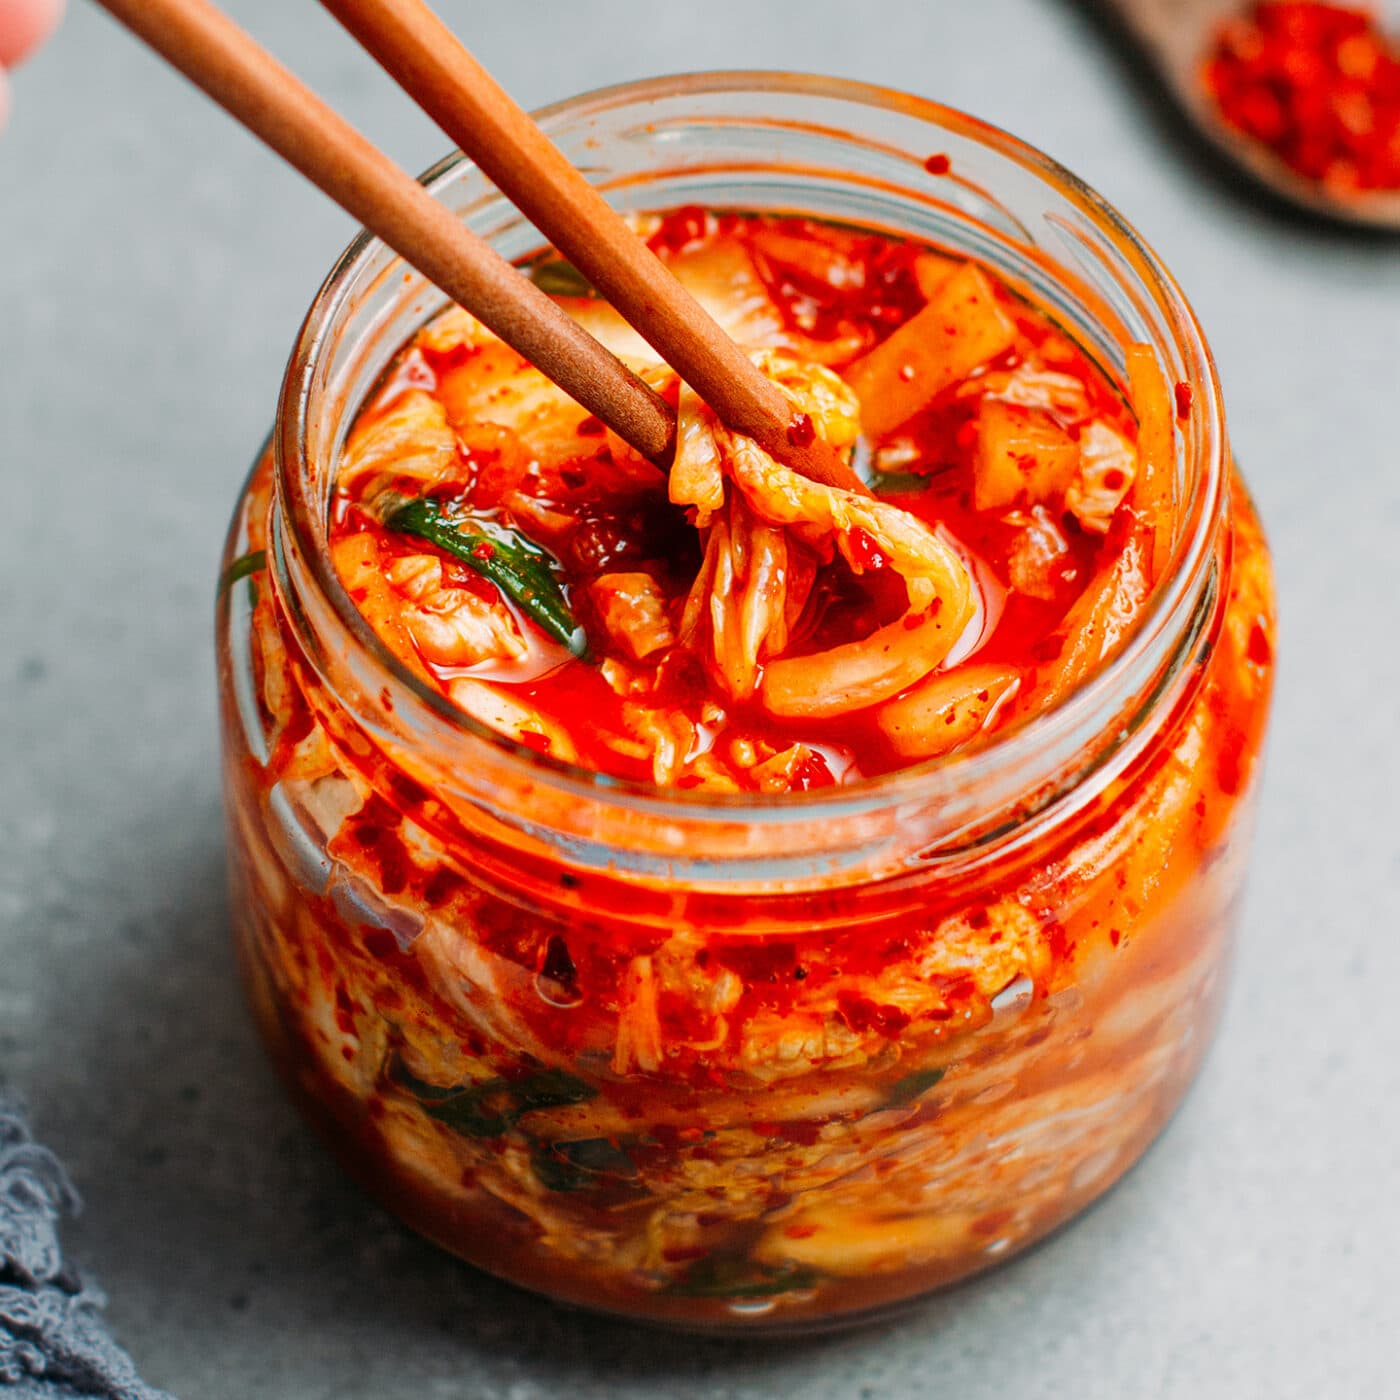
Homemade Vegan Kimchi
Equipment

Ingredients
- 1 medium head napa cabbage about 2.2 pounds
- 1/4 cup salt
- 5 stalks scallions cut into 2-inch pieces
- 1/2 medium white daikon radish peeled and cut into thin matchsticks
Kimchi Chili Paste
- 1/2 cup water
- 1/4 cup sugar
- 1 tbsp sweet rice flour
- 1 tbsp vegan fish sauce or soy sauce
- 1/3 cup gochugaru (Korean chili powder)
- 2 cloves of garlic minced
- 1 inch ginger finely chopped
Instructions
- Cut the cabbage in quarters lengthwise. Remove the hard core part and discard. Using a large knife, cut each quarter into 1-inch wide strips.
- Rinse the cabbage under cold water to remove possible dirt. Transfer the rinsed and drained cabbage to a large bowl. Add the salt and massage the cabbage with the salt using your hands or two spatulas.
- Let the cabbage rest for about 3 hours at room temperature, stirring once halfway. In the meantime, prepare the chili paste. Check the recipe below.
- After 3 hours, drain the cabbage but keep the brine. Rinse the cabbage twice under cold water, but do not squeeze it. Just give it a rinse.
- Transfer the drained cabbage to a large mixing bowl and add the sliced daikon radish and green onions Toss well to combine.
- Pour in the chili paste and stir to coat the cabbage with the paste. You can use your hands with gloves to massage the cabbage or simply use two spatulas.
- Pack the coated cabbage very well into 2 one-quart jars (do not fill it to the top, leaving about 1/3 to allow the cabbage to expand). Make sure there are no air bubbles. Next, pour in about 1/4 cup of the reserved brine on top of the packed cabbage into each jar. Cover with a lid, but do not screw it completely. You want to allow some air to escape.
- Place the jars in a dark place at room temperature (about 65-70°F) for 48 hours to ferment.
- After one day, use a spoon to submerge the cabbage again in the brine if it has risen above the surface.
- After 48 hours, the cabbage should have expanded a little bit and you should see some bubbles in the brine. Your kimchi is now ready!
- You can use it immediately or place it in the refrigerator for another 3-5 days to allow the flavors to develop and merge. I personally think kimchi tastes even better after 1 week in the refrigerator.
- Kimchi will keep in the refrigerator for up to 4 weeks. It can probably be kept for longer than that, but I haven't personally tried as I always finish it quickly.
Kimchi Chili Paste
- Add the water, sugar, and sweet rice flour to a medium saucepan. Heat over medium heat, whisking constantly until the sugar dissolves and the mixture slightly thickens. It should take 3-5 minutes.
- Once the mixture has thickened, transfer it to a bowl and add the gochugaru (Korean chili powder), vegan fish sauce, minced garlic, and ginger. Stir to make a paste.
Notes
- Do not fill the jars to the top. Leave at least 1/3 to let the kimchi expand a little bit. As it ferments, the kimchi will expand.
- If you are not used to spicy food, reduce the amount of gochugaru. This recipe yields kimchi that is quite spicy. Use half of the chili powder for milder kimchi.
- After 1 day, push the cabbage back into the brine. Cabbage tends to rise above the surface in the beginning. Use a spoon to submerge it in the brine.
- At first, the brine will be very liquid. This is totally normal. It will thicken as it sits.
- Do not leave it at room temperature for too long. I found that 48 hours at room temperature (at about 68°F) was the perfect fermentation time to get a nice sourness.
Nutrition

About the Author
Thomas Pagot is the founder, photographer, and recipe developer behind Full of Plants. He created the blog in 2016 as a personal cookbook for vegan recipes. Through years of recipe development, Thomas has successfully grown Full of Plants into a trusted resource for plant-based recipes.

FREE VEGAN RECIPES EBOOK!
Join our newsletter to get your FREE 100-page printable eBook! You’ll also get new recipes delivered by email weekly.
Leave a Comment
Hi Thomas,
I would love to try this recipe, but where I live it’s impossible to find napa cabbages. Do you happen to know how can I substitute it with?
Thank you
Hi Anna,
This recipe should work well with savoy cabbage as well.
Nearly anything can be fermented to be kimchi.
Napa cabbage is baechu kimchi.
Green cabbage of sauerkraut fame works fine. I slice the ‘ribs’ finer. Dry mushroom, seaweed, fruit all optional for your own family recipe!
Hola, se puede sustituir la harina de arroz por algo con menos hidratos? Gracias
I guess you could simply omit it, the juice will be a little bit thinner.
Just a heads up that your vegan fish sauce link links to one made with anchovies!
Are you visiting from the US? If not, I am guessing Amazon is redirecting you automatically to a wrong substitute, unfortunately I have no control over that.
I’m from Canada so that’s probably what’s happening! Found a recipe to make my own though – I’m excited to try your recipe 😀
This recipe looks quite easy to make. So, I think I will give it a shot this weekend. I’ve tried so many recipes of kimchi before. Unfortunately, it’s super hard to find the one that can taste good enough to me. Especially about the combination of the spiciness and saltiness. Anw, thanks a bunch and wish me luck to succeed in finding my favorite recipe for kimchi this time!😁
Let me know how it goes! Hope you will enjoy the flavor balance of this kimchi 😉
I live in a hot climate, currently around 30c/ 86f. Should I let it ferment just 24 hours instead of 48?
24H could be enough, or it might take a bit more, it really depends. You can tell it’s done when there are some bubbles forming inside the jars. The kimchi should also be a bit sour.
Thank you. I ended up adding more than 1/4 cup of brine as I wanted to submerge the cabbage like I do with saurekraut. Will it take longer to ferment with more brine?
I won’t affect the fermentation time.
Just tried your vegan Kimchi recipe. It’s excellent! Thank you.
Glad you liked it Emy 😉
Could you use gochujang ready made paste instead of the recipe for this.
I would not recommend it. It is quite different compared to the paste in the recipe.
Should I let it ferment for 24 hours instead of 48 as I live in a hot climate, around 30c
Excellent recipe! I have used it many times 🙂
Thanks Kim!
I would love to make this with less salt for health reasons. Is that possible?
I think you should be able to slightly reduce the saltiness without affecting the fermentation process. I would try reducing by about 1/4 to 1/3 the amount of salt.